Sunday, January 26, 2014

Crock Pot Sweet Potato Turkey (or Beef) Chili and Garlic Cheddar Beer Biscuits


Are you experiencing the same frigid winter temperatures that we're experiencing in Boston (aka Polar Vortex 2)? If so, this slow cooker chili is for you! Side note: as I just typed, "slow cooker," I actually typed "cookie" instead of cooker. Guess cookies are always on my mind. :)

Aaaanyway, back to the slow COOKER chili. This recipe is a breeze! I made it twice in December but am only now getting around to blogging about it. I wanted to make sure to share it with you while there is still plenty of winter weather ahead of us. And in New England, we have at least two more months of it. ;)

This recipe is from a blog, Catz in the Kitchen. This is a great recipe to enjoy on a weekend day when you're busy running errands or getting household chores done...or, on a weekday when you've had a long day of work and don't have the time to cook dinner! Crock pots are seriously the best, aren't they?

Ingredients:

-1 can (28 oz.) crushed tomatoes
-1 can (14 oz.) diced tomatoes, with liquid
-1 can (15 oz.) black beans, with liquid
-1 can (15 oz.) kidney beans, with liquid
-2 large sweet potatoes, peeled and chopped into 1-inch pieces
-1 medium onion, chopped finely
-2 garlic cloves, minced
-1 lb. ground turkey or beef, browned
-2 Tbsp. chili powder
-1 Tbsp. ground cumin
-2 tsp. smoked paprika
-1 Tbsp. brown sugar
-1/2 tsp. salt

Instructions:

In a medium-large skillet, brown the turkey or beef until cooked through. Pour into crock pot (a 5 or 6 qt. crock pot will do). Add the rest of the ingredients in the crock pot and stir until well combined. Place lid on crock pot and cook on low for 8 to 10 hours. The chili will be done when the sweet potatoes are soft and fork tender. Makes 8 to 10 servings.


I served this chili with some amaaazing garlic cheddar beer biscuits. Although these biscuits can't be made in the crock pot (darn!), they are incredibly easy and pair very well with this dish. So if you have the time, I highly suggest whipping up a batch of these biscuits to enjoy with this warm, hearty chili.


Ingredients:

-2 cups self-rising flour*
-1 tsp. garlic powder
-1 tsp. baking soda
-1/2 cup unsalted butter, cut into small cubes, chilled
-4 oz. sharp white cheddar cheese, shredded
-8 oz. beer (pick your favorite!)**
-4 Tbsp. butter
-2 tsp. garlic powder

*Note: If you don't have self-rising flour, don't worry! You can make your own; that's what I did. Just follow this method from King Arthur flour of mixing all-purpose flour with baking powder and salt.

**Also, if you prefer not to use beer, you can substitute milk.

Instructions:

Preheat oven to 425 degrees and line two baking sheets with parchment paper. Combine the self-rising flour, 1 tsp. garlic powder, and baking soda in a large bowl. Using a pastry cutter or fork, cut in the chilled butter until the mixture resembles coarse sand. Stir in the cheese until well incorporated, followed by the beer.

Turn the mixture out onto a well-floured surface and knead for about 1 minute or until the dough is smooth and no longer sticky. Form into a round ball and roll or pat it down into a large circle about 1/2-inch thick. Use a biscuit cutter to cut dough into biscuits, and place them onto prepared baking sheets. Roll out scraps of dough again, and continue forming into biscuits until all dough is used.

Melt the additional 4 tablespoons of butter, and mix in the two teaspoons of garlic powder with the butter. Using a pastry brush, give each biscuit a generous coating of the garlic butter. Bake for 10 to 11 minutes or until edges are lightly golden brown. Remove from oven and serve warm biscuits with chili.


We LOVED these biscuits. They were soft, flakey, and full of wonderful flavors. A perfect accompaniment to the delicious chili! 


Please, please make this chili and these biscuits. You won't regret it! It's a meal your whole family will love, and it will both fill and warm you up on a cold winter's night. I promise. :)

Wednesday, January 22, 2014

Cookie Butter White Chocolate Oatmeal Cookies


Biscoff. Cookie Butter. Speculoos. I talked about this amazing product last summer on the blog when I made my chocolate and cinnamon chip cookie butter cookies. Do you remember? Well, if not, you should go back and take a look at that post. I go on and on and on about how much I love cookie butter. If you don't yet know it, you need (noticed how I bolded, italicized, and underlined that? :)) to get to know it! 

This recipe is adapted from the ever wonderful, Sally's Baking Addiction. I've made several of Sally's recipes thus far, and they're always excellent!

Ingredients:

-3/4 cup all-purpose flour
-1/4 tsp. salt
-1/2 tsp. baking soda
-1/2 tsp. baking powder
-1/2 cup unsalted butter, melted
-3/4 cup dark (or light) brown sugar
-1 large egg
-1/2 cup cookie butter/Biscoff/speculoos spread (creamy or crunchy)
-2 tsp. vanilla extract
-2 cups quick oats (do not use regular oats)
-1 and 1/4 cups white chocolate chips or chunks 

Instructions:

Preheat oven to 350 degrees. Line two large cookie sheets with parchment paper and set aside. Melt the butter in the microwave or on the stove and let cool slightly. In the meantime, whisk the flour, salt, baking soda, and baking powder together in a large bowl; set aside. In a large bowl, whisk together the melted butter and brown sugar until no lumps remain. Whisk in the egg, followed by the cookie butter spread, until combined. Finally, whisk in the vanilla extract. Pour the wet ingredients into the dry ingredients, and stir together with a spatula. Fold in the oats and 1 cup of the white chocolate chips. The dough will be thick and heavy.

Form dough into balls (about 2 to 3 Tbsp. of dough each), and place on cookie sheets, two inches apart. Bake cookies for 11 to 12 minutes. The cookies will look soft and slightly underbaked; this is okay, as they will bake a little more while on the cookie sheets. If desired, press down the cookies slightly to flatten them out (I did not do this). Also, if desired, press remaining 1/4 cup of white chocolate chips/chunks into top of cookies (also, I did not do this step). Allow cookies to cool for 10 minutes on cookie sheets before removing to cool completely on cooling racks. Store in airtight container for up to 1 week. Makes 18 to 20 cookies.


These cookies are sweet but not overly so. The white chocolate chips add to the sweetness. And the cookie butter flavor lends a nice change of flavor from a more traditional cookie. The cookies have some great gingerbread and cinnamon flavor notes. And the oats? Well, they make these a healthy cookie, of course! ;)


I loved the texture of these cookies, too. Chewy and airy with an ever so slight crunch around the edges. Cookie texture perfection!

If you end up trying these cookies, be sure to use quick, not regular oats. But what if you only have regular oats in your pantry? No problem! Pulse those regular oats a few times in your food processor, and voila, you'll have yourself quick oats. As Sally notes in the original blog post, the finer quick oats act more like a flour in this recipe and are important to the way this dough comes together; regular oats won't allow the dough to bind together as it should.


Cookie Butter. Go get yourself some. ASAP.

But a warning if you have this in your house: you may want to eat it by the spoonful.

Don't say I didn't warn you!!


Just realized it's been 17 days since my last post. OOPS! Hopefully I'll get back to posting once or twice a week again soon. In the meantime, hope everyone has been enjoying some delicious goodies in their own kitchens. :)

Sunday, January 5, 2014

Chocolate Avocado Cookies


Chocolate avocado cookies? Yes! You read that right. The avocado in these cookies, along with some coconut oil, takes the place of the butter that you'd find in a traditional cookie recipe. So if you're looking for a slightly healthier option, definitely give these a try! And these cookies are also vegan - another added bonus. Although I do not eat vegan, I have a few friends who do, so it's always nice to have options for dessert recipes I can make for them. :)


This recipe is from Two Peas and Their Pod, an awesome blog.

Ingredients:

-1 and 1/4 cups all-purpose flour
-1 tsp. baking powder
-1/2 tsp. sea salt
-2/3 cup Dutch processed cocoa powder
-1/4 cup coconut oil
-1/4 cup mashed avocado
-1/4 cup granulated sugar
-1/2 cup brown sugar
-1 tsp. vanilla extract
-1/3 cup almond milk (or cow's milk - but they won't be vegan)
-1/2 cup chocolate chips (vegan ones, if desired)

Instructions:

Preheat oven to 350 degrees. Line a baking sheet with a silpat or parchment paper. In a medium bowl, whisk together the flour, baking powder, salt, and cocoa powder; set aside. In a stand mixer or with a hand-held electric mixer, beat the coconut oil, avocado, and both sugars together until creamy and smooth, about 2 to 3 minutes. Add in the vanilla extract. With the mixer on low, add half the flour mixture, followed by the milk. Add the remaining dry ingredients and incorporate until well-combined. Stir in the chocolate chips.

Place dough by the tablespoonful on prepared baking sheets, placing balls of dough about 2 inches apart. Slightly flatten the cookies with your hand or a spatula. Bake cookies for 10 minutes, or until set around the edges but still soft in the center. Let cookies sit on baking sheet for about 2 minutes before removing to cooling rack to cool completely. Makes about 20 cookies.


These cookies turned out to be very chocolatey, which I loved. And they were quite dense, chewy, and fudgey also. Score! A very good cookie. Definitely a keeper.


 I have to say though, that although you could not taste the avocado, I do think that if you were looking for a difference in these cookies, you might be able to detect that they don't have butter in them. But honestly, if you weren't trying to figure out what's different, I don't think you could tell! Also, you can't taste the coconut oil either in case you were wondering.


If one of your resolutions is to bake healthier...or to be more "daring" in your baking, then add this recipe to your list. Although I didn't make any official resolutions, in general I am trying to bake and cook more often with ingredients that are less familiar to me. Coconut oil is an ingredient I've been wanting to try but hadn't until recently. So far so good! I used it in this cookie recipe and in another homemade granola recipe I made last week also. I have a feeling coconut oil may become a staple in my kitchen! I've read so many great things about it and am glad I finally gave it a try.

Have a wonderful start to your week, all!

PS - To be sure you see my posts regularly, Follow my blog with Bloglovin! :)

Monday, December 30, 2013

2013: Year in Review

I thought it would be fun to do a brief Year in Review of What's Baking in the Barbershop?! for 2013. Many other blogs I follow have done this, and I always enjoy reading their year-end recaps. Sometimes bloggers share their most popular posts with readers, their own personal favorites, and various highlights from their own personal lives. I thought I'd follow suit and share a few in each of these categories!

First, a brief recap of the posts that were most popular with my readers this past year...


The post for these cookies ended up surpassing my chocolate chip graham cracker blondies as my most viewed post of all time!


My own personal favorite recipes that I posted in 2013?

Well, a few are the same as what my readers liked! I was a huuuuge fan (and still am) of the chocolate almonds date balls and the peanut butter oat granola bars. And my other favs... 


And a couple other highlights from my year...

Going on a most amazing honeymoon to France and Belgium this summer with my husband! If you missed some of the pictures I shared, you can check out this post.


Celebrating our one year wedding anniversary in November. :)


We celebrated with a wonderful meal at Ten Tables in Jamaica Plain.

And finally, we sold our condo! That was definitely a big highlight. Although we are sad to leave the city, we are ready for a house in the 'burbs with more space. We are still house hunting (the Boston market right now is ridiculously tough for buying!), and thankfully, we are lucky enough to be staying with my in-laws in the meantime while we house hunt... We're really hoping that 2014 is our year to find our new home! :)

I also wanted to share a big thank you to my readers who continue to read my blog; you are very much appreciated! The blog "audience"is what keeps me going. Although I may not post as frequently as I used to, I still really love trying new recipes and sharing them with you in this little space. Thank you for being there for me!

And I wish everyone - all of you - the best year yet in 2014. :)


Monday, December 16, 2013

Chocolate Espresso Crinkle Cookies


The countdown is on! Fewer than 10 days until Christmas. Have you done your fair share of holiday baking already, or have you yet to start?! I have done some here and there, but I plan to do more. Thankfully, I've already made these awesome cookies with enough time to spare before Christmas to share them with you! If you're still looking for more Christmas cookie recipes to try, then stop looking. I've found one for you. ;) These chocolate espresso crinkle cookies are amazing.

The fabulous recipe is from Heather Christo.

Ingredients:

-1/2 cup unsalted butter, softened
-1 and 1/2 cups sugar
-2 eggs
-3 Tbsp. espresso, cooled
-2 cups all-purpose flour
-1 cup unsweetened cocoa powder
-2 tsp. baking powder
-1 tsp. salt
-1 to 2 cups powdered sugar (for rolling)

Instructions:

Preheat oven to 350 degrees. Line cookie sheets with a silpat or parchment paper. With an electric mixer, cream together the butter and sugar. Add the eggs, one at a time, followed by the espresso. Mix everything together until well combined. In a separate bowl, combine the flour, cocoa powder, baking powder, and salt; add dry ingredients to the wet. Scoop dough by the tablespoonful, roll into balls, and then coat by rolling in powdered sugar. Place on cookie sheets, and bake for 8 to 10 minutes or until cookies "crack" and are set. Let cool for a couple minutes before removing to cool completely on cooling rack. Store in airtight container. Makes about 30 cookies.


 I baked these the day after we got our first snowstorm of the season. It was a perfect way to spend a snowy afternoon!


We love these cookies. If you know someone who loves coffee and chocolate, definitely make these for them! They are soft, chewy, and full of flavor. And the espresso definitely kicks up the chocolateyness (yes, that's a word) a notch.

Also, a few notes about the recipe and method... I did use espresso, although my guess is you could try making these with regular coffee - just brew it strong! Also, I refrigerated my dough, only for 10 - 15 minutes or so, before rolling it into balls. It made it slightly easier to work with. That being said, it wasn't a very difficult dough to work with in the first place! So chilling is definitely not necessary (the original recipe does not instruct to chill the dough). And finally, I only needed about 1 cup of powdered sugar for rolling although the original recipe calls for 2 cups. So, I recommend starting out with just 1 cup so you don't "dirty" more powdered sugar than you have to. And finally, my cookies took closer to 11 or 12 minutes to bake, instead of 8 to 10 - so just keep an eye on yours. As we all know, baking times will vary with each oven!


Santa was eyeing these cookies... I think he'd like some left out for him on Christmas Eve. ;)


These are a perfect Christmas cookie, in my opinion! I hope you get the chance to make them this season. :)

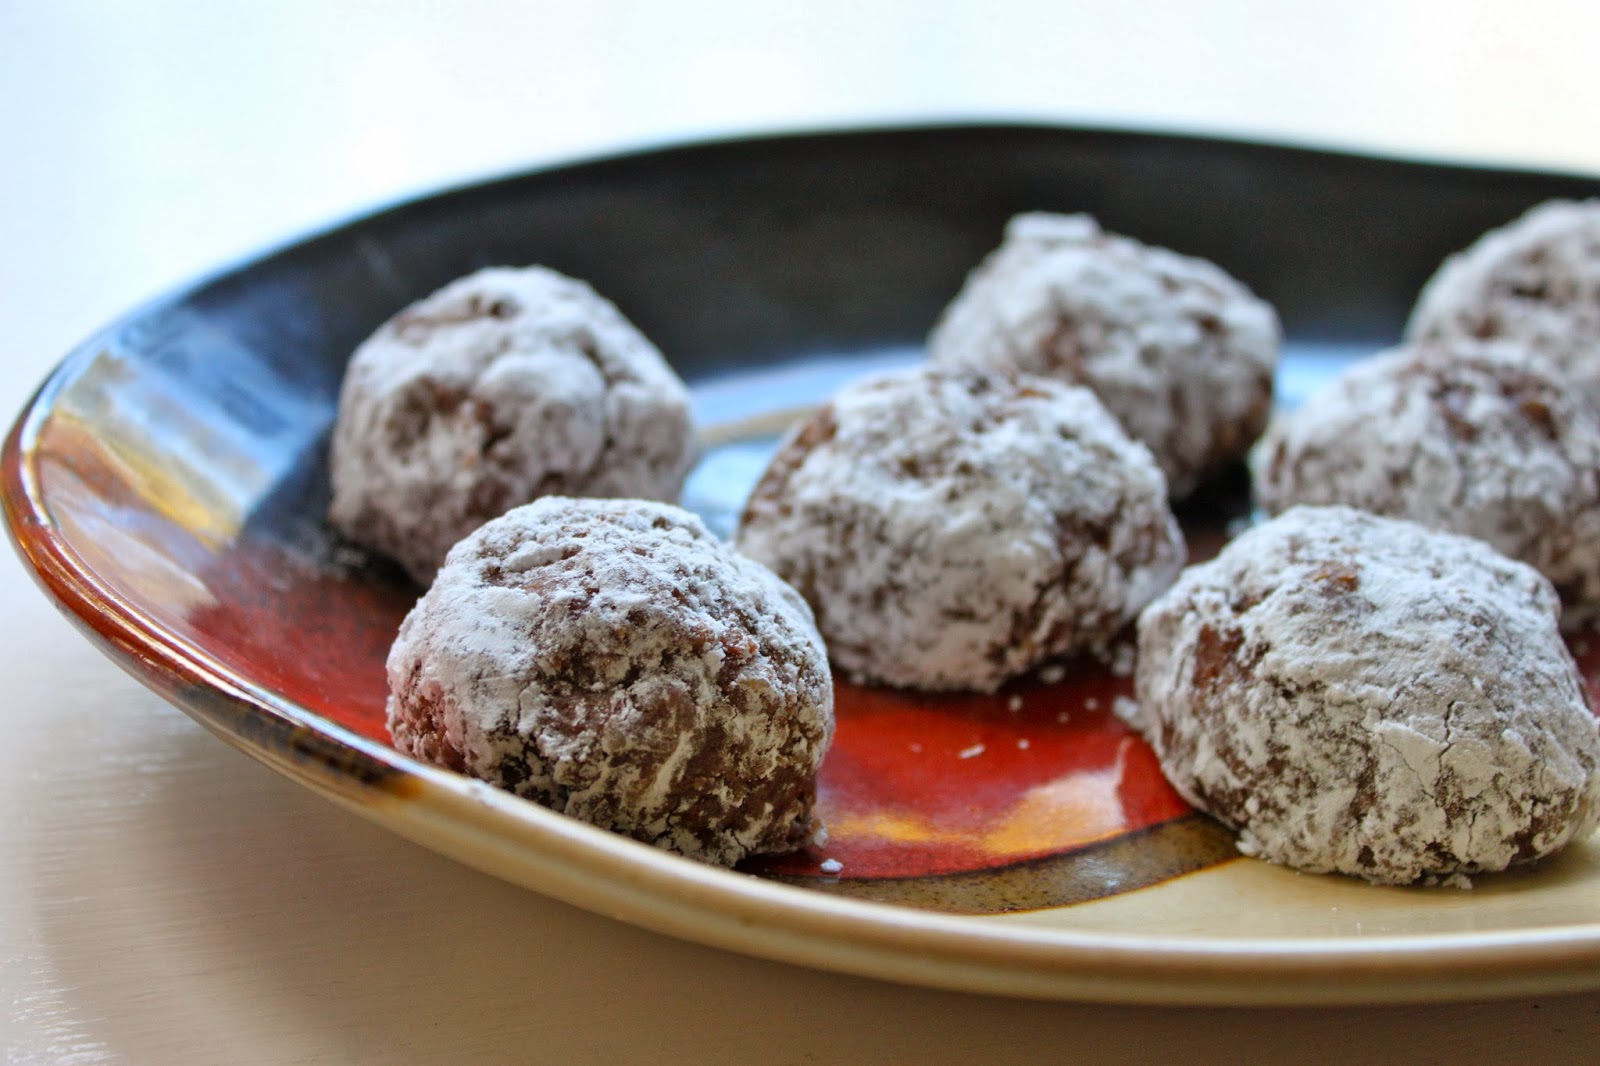
Btw, apparently I'm into sharing recipes lately that involve rolling things in powdered sugar! In case you missed it, these rum balls I recently posted about would also make an excellent Christmas treat this season.


Monday, December 9, 2013

Rum Balls (No Bake)

Rum balls = holiday time. Wouldn't you agree? :)


Last year I made some deeelicious Bailey's balls, and boy, were they good! I think I made them three different times for various holiday-themed occasions, and they were a big hit every time. For the first holiday party that we attended this past weekend, I wanted to bring the Bailey's balls...but the blogger in me also wanted to try something new! I know all you other bloggers know what I mean... So, I made some Bailey's balls and I tried a new recipe for rum balls. Thankfully, they turned out quite well also!

And these rum balls couldn't be any easier, just like the Bailey's balls. They come together in 15 minutes flat. Perfect for when you're rushing around at the last minute, getting ready for that holiday party this coming weekend but don't yet have a treat to bring. ;)

The recipe is adapted from this recipe from Taste of Home.

Ingredients:

-2 and 1/2 cups graham cracker crumbs (or vanilla wafer crumbs)
-1 cup ground pecans (or walnuts)
-1 cup confectioners' sugar
-2 Tbsp. plus 2 tsp. unsweetened cocoa powder
-1/4 cup rum
-3 Tbsp. honey (or maple syrup)
-2 Tbsp. water
-additional graham cracker crumbs, ground pecans, or confectioners' sugar

Instructions:

In a large bowl, combine the graham cracker crumbs, ground pecans, confectioners' sugar, and cocoa. In a small bowl, combine the rum, honey (or maple syrup), and water. Stir the wet ingredients into the dry ingredients until well incorporated. Shape into 1-inch balls. Roll into the additional graham cracker crumbs, pecans, or confectioners' sugar to "garnish." Store in airtight container in fridge for a couple weeks. Makes about 2 dozen balls.


A few points to note...

The original recipe actually called for crumbs of vanilla wafers, not graham crackers. But graham crackers are what I had on hand, so that's what I used. I'm sure vanilla wafers would work just as well. Also, I used a combination of ground pecans and walnuts, as I didn't have enough pecans on hand. Again, this worked just fine! I love recipes like this where it's easy to improvise. And finally, the original recipe called for honey, but I tried maple syrup instead. Easy and delicious! So, keep in mind when you make these that you have some options. ;) For the rum, I used Captain Morgan's, as you can see in the photos.


You can definitely taste the rum in these! It wasn't too much though. It was juuuust right. They're just slightly chocolatey and sweet, and then that rum flavor comes through as well. And they're fun to eat besides! I also think the flavor of these is even more enhanced a day or two after you make them. So, if you have the time to make them ahead, definitely do that!


In need of other ideas of sweet treats to make this holiday season? Maybe to give to friends or coworkers? Or to bring as a host/hostess gift to a holiday party? Then check out these other recipes that have previously been on the blog. They're all fairly simple - perfect for this time of year when you might not have much extra time to spend in the kitchen!

Chocolate Covered Sea Salt Caramels


Cinnamon Sugar Almonds


Hershey Kiss Pretzel Bites


Easy Peanut Butter Fudge

Chocolate Graham Toffee Treats

Cranberry White Chocolate Cinnamon Chip Bars

Sunday, December 1, 2013

Cranberry, Oatmeal, Cinnamon Chip Cookies


The holiday season is here! Hard to believe, but it's true. And with the holiday season comes cookies. Of course. :)
Whether it's for a family gathering, a work party, or a cookie swap with friends, this time of year there always seems to be a reason to eat cookies.

And to me, any reason to eat a cookie is a good reason. ;)


These cranberry, oatmeal, cinnamon chip cookies are just a simple variation on another couple cookie recipes I've shared on the blog before. This recipe involves the same base cookie dough recipe as my pecan, cranberry, cinnamon chip cookies and these oatmeal, butterscotch, chocolate chip cookies. The main thing I changed this time around was just the add-ins. It's almost too simple to share on the blog, but we enjoyed this ingredient combination so much that I decided it was blog worthy!


Ingredients:

-6 oz. (1 and 1/2 sticks) unsalted butter
-1 cup packed light brown sugar
-1/2 cup sugar
-2 eggs
-2 tsp. vanilla extract
-1 cup all-purpose flour
-1 cup white whole wheat flour
-1/2 tsp. salt
-1/2 tsp. baking soda
-1 tsp. cinnamon
-3/4 to 1 cup regular oats
-3/4 cup dried cranberries
-3/4 cup cinnamon chips

Instructions:

Preheat oven to 350 degrees. Melt butter, and let cool slightly. Combine the two sugars in a large mixing bowl with a whisk, and once the butter is cooled slightly, whisk in the butter with the sugars. Whisk in the eggs and vanilla. In a medium bowl, combine the flours, salt, baking soda, and cinnamon. Add the dry ingredients to the wet ingredients, and mix until just combined. Stir in the oats, cranberries, and cinnamon chips.

Line baking sheets with parchment paper, and drop cookie dough by the tablespoonful on baking sheet. Bake for 10 to 12 minutes or until outside edges of cookies are lightly browned. Remove from oven and let cool for a couple minutes before removing to cooling rack to cool completely. Once completely cooled, store cookies in an airtight container. Makes approximately 2 dozen cookies.


What I love about these cookies (and the other cookies made with the same base dough recipe) is 1) how simple they are (you don't even need a mixer), 2) how full of flavor they are, and 3) how soft and chewy they are. There is just a very, very slight crisp to the outside edges of these cookies, but the overall texture of these is definitely chewy. It's my favorite kind of cookie!


I think these would make a great addition to your holiday cookie swap or dessert table over the holidays. The cranberries and cinnamon are such perfect flavors for this time of year.


Happy December! I hope everyone had a fabulous Thanksgiving filled with family, friends, and delicious food. Thanksgiving is my favorite for those reasons. :)

Friday, November 15, 2013

Is It Really Mid-November Already?! :)

 I can't believe it's mid-November! Can you? As you can probably tell from my lack of blog posts lately (my last one was 10 days ago!), life has been pretty busy. The hubs and I are moving soon, and as everyone knows, moving is stressful! And it's time consuming. I just haven't had the time, nor the energy, to focus on blogging. Hopefully after the move and we're feeling more settled, I'll be back to baking and blogging!

In the meantime, I thought I'd just share a fun blog post with you...a little of this and a little of that!

First thing? Mike and I celebrated our one year anniversary on November 3rd! I can't believe it. That year flew by. :)


We celebrated by going out for a nice dinner at one of our favorite local restaurants in Jamaica Plain, Ten Tables (I've actually blogged about it before). It was amaaaazing. We rated it in our top three meals ever! Now that's pretty good.


Needless to say, after we ate all the food pictured here, we were pretty full! :)

What else, let's see...

Tea! Now that it's gotten much colder, I've been having tea at least once or twice a day.


One of my favorite kinds is Yogi's Kava Stress Relief. I love that each tea bag has a quote on it too. This one was one of my recent favorites: "Mental happiness is total relaxation." It's a delicious tea too, flavored with cinnamon, sarsaparilla, ginger, and cardamom. I highly recommend it!

During the month of October, Mike and I joined the October Unprocessed pledge with Eating Rules, where with thousands of other people, we pledged to eat as many unprocessed (and as few processed) foods as we could. It was a great challenge! We really enjoyed the experience. I plan to write a blog post about it at some point...

Lastly...eggs! Mike and I cook eggs all the time, and we've recently made a couple delicious egg recipes, one of which was eggs poached in tomato sauce. Oh. My. Goodness. So good! And so easy too. We enjoyed this as an easy weeknight meal. I followed this recipe in case you want to try it yourself! And we added some crumbled feta on top. Because feta makes everything bettah!


I hope you don't mind the randomness of this post, but I thought it would be fun to share with you some bits of life outside the blog!

Oh, and TGIF ;)