Showing posts with label cupcake. Show all posts

Monday, December 12, 2011

Chocolate Cupcakes with Peppermint Icing and Crushed Candy Cane "Sprinkles"


Remember those chocolate whoopie pies with peppermint buttercream filling last week? Right. My obsession with the combination of peppermint and chocolate. Well, here it is again but this time it's in cupcake form. :)

I made these cupcakes for a coworker's birthday last week. They were eaten quickly and folks used positive words to describe them. I am going to go out on a limb and say they were a success. ;) The chocolate cupcake recipe is the same one I used when I made my oreo stuffed chocolate cupcakes a few weeks back, and the icing recipe is from a great little book Cupcakes! by Elinor Klivans.

Ingredients for the cupcakes:

-1/2 cup unsweetened cocoa
-1 cup hot water
-1 and 2/3 cups flour
-1 and 1/2 cups sugar
-1/2 tsp. baking soda
-1/2 tsp. salt
-1/2 cup butter, softened
-2 eggs
-1 tsp. vanilla


Ingredients for the icing:
-2 and 1/2 cups powdered sugar
-1/4 cup unsalted butter
-6 Tbsp. water
-1/4 tsp. peppermint extract

Also:
-crushed candy canes to sprinkle on top :)

Instructions:

Preheat oven to 350 degrees. Place paper cupcake liners in muffin pan. Mix the cocoa with the hot water in a bowl until the mixture is smooth. Set aside and let the mixture cool for about 10 minutes. When it's cool, place it in a mixing bowl and add the flour, sugar, baking soda, salt, butter, eggs, and vanilla. Beat on low speed for two minutes. Increase speed and beat for two additional minutes. Fill the cups about 2/3 to 3/4 of the way full. Bake for 15 to 20 minutes, or until a toothpick inserted into the center comes out clean. Remove from pan and let cool completely on wire rack before topping with the icing. Makes approximately 18 cupcakes.

For the icing, sift the powdered sugar into a large bowl. Heat the butter and water in a small saucepan over medium-low heat until the butter melts. Remove the pan from the heat and stir in the peppermint extract. Pour the warm mixture over the powdered sugar, then whisk vigorously until it is smooth. The icing will be soft but thick enough to cling to the tops of the cupcakes. Immediately sprinkle with crushed candy canes, if desired. These cupcakes can be stored at room temperature, covered tightly, for up to 3 days.


I crushed candy canes in my food processor - worked like a charm! So easy.


One thing I might do differently next time is make the icing thicker than it was. The icing was definitely tasty with a strong peppermint flavor; however, in my opinion, it was a bit too runny. I would have just added more powdered sugar this time around, but I had actually run out! At the time I made these, I had just the two and a half cups called for in the recipe. Oops! Probably 98% of the time, I have extra on hand of just about every baking staple you can think of. Not this time though! Oh well. The icing was still very yummy but I would have preferred it to be a bit thicker, that's all! No big deal. :)


Tuesday, November 1, 2011

Oreo Stuffed Chocolate Cupcakes with Kahlua Cream Cheese Frosting


Yes, you heard me right. Or, rather, you read my words correctly. ;-) These are OREO STUFFED chocolate cupcakes. I was inspired to try this by recently reading some recipes about making oreo stuffed chocolate chip cookies. I actually bought oreos several weeks ago with the intent to make those cookies. But then came the occasion of a coworker's birthday (which also happened to fall on Halloween!), and I thought to myself, you should really use those oreos you bought a while ago. I wanted to make cupcakes for the birthday occasion though since they're much more birthday-like than cookies. And then there it was - the idea for oreo stuffed cupcakes! As soon as I had the idea, I knew it would be a winner.


When making cupcakes on Halloween, one must use Halloween-themed liners!


The oreos I used weren't classic oreos; rather, they were these newfangled "heads or tails" oreos that have one chocolate wafer and one vanilla one. Even better - the best of both worlds!

I'll share the actual cupcake ingredients later on in the post, but first, the method of stuffing the cupcakes... It's quite simple really.


Put a spoonful of cupcake batter in the bottom of the liner. And by spoonful, I mean about a tablespoon or so?


Next, the oreo goes in!


Finally, place more cupcake batter on top of the oreo and fill until the cup is about 2/3 to 3/4 of the way filled. That's it folks!


You can easily use whatever cupcake recipe you love too (doesn't have to be the one I share below!). If you have a favorite homemade chocolate cupcake recipe you love, use it. Or, try the oreo stuffed cupcakes with vanilla or peanut butter cupcakes. Whatever you want!!


I used a new recipe from this fun book. The original recipe was just for the chocolate cupcakes. The addition of the oreos was a Barbershop twist on the original. Oh, and actually, I added the salt and vanilla to the ingredients list myself too. They weren't in the original recipe.

Ingredients:

-1/2 cup unsweetened cocoa
-1 cup hot water
-1 and 2/3 cups flour
-1 and 1/2 cups sugar
-1/2 tsp. baking soda
-1/2 tsp. salt
-1/2 cup butter, softened
-2 eggs
-1 tsp. vanilla
-20 to 24 oreos (any kind will do!)

Instructions:

Preheat oven to 350 degrees. Place paper cupcake liners in muffin pan. Mix the cocoa with the hot water in a bowl until the mixture is smooth. Set aside and let the mixture cool for about 10 minutes. When it's cool, place it in a mixing bowl and add the flour, sugar, baking soda, salt, butter, eggs, and vanilla. Beat on low speed for two minutes. Increase speed and beat for two additional minutes. Using the method I described above, make your oreo stuffed cupcakes and fill the cups about 2/3 to 3/4 of the way full.

Bake for 15 to 20 minutes, or until a toothpick inserted into the center comes out clean. Remove from pan and let cool completely on wire rack before frosting.

I was pretty pleased with the flavor of these cupcakes. And they were very moist! That's key for me when it comes to cupcakes.

For the frosting on these little gems, I used a recipe I previously posted about and looooved. It's this kahlua cream cheese frosting. Use any frosting you'd like though! Classic vanilla or chocolate frosting would be great with these cupcakes.

Now, because I was making these cupcakes for a Halloween birthday, I decided to decorate them in a way that fit Halloween. I made them into mummies!  The method to make mummies is very simple. And you don't have to be very precise either which is always nice. :) I used my Wilton cake decorating tip #47. Basically, to create the mummy look, just pipe lines with your pastry bag any which way you want on top of the cupcake and you've got yourself a mummy! Then place a couple candies of your choice on top for the eyes. Anyone can do it! No need for them to look perfect.


I made about a dozen mini cupcakes too! These did not have oreos in them though. :(


Here's my family of mummies, just chillin'. Little did they know the fate that was around the corner for them... Poor mummies didn't know they'd be completely devoured the next day.


The first night I made these, I taste tested one just to be sure they were worthy of being fed to my coworkers and the birthday guest of honor the next day at work. Rest assured; they were.

Below are a few more looks at the deliciousness that is the newly discovered favorite type of cupcake among my coworkers...


Cupcakes will never be the same!!

Saturday, April 23, 2011

"Bird Nest" Carrot Cake Cupcakes with Cream Cheese Frosting


Happy Easter!! I'm enjoying a wonderful Easter weekend at home with my family in good ol' upstate NY, and I hope that if you celebrate Easter, you're enjoying the holiday as well! As per usual, my mom asked me to bake a dessert for Easter dinner (hmmmm, I wonder why she asked me to bake something?!). Although I love carrot cake, I have never made it (gasp!), so I thought I'd give it a whirl since it seems like a very spring-like, Easter dessert to me. I mean, carrots & bunnies....they go hand in hand, right?

As you can see, I took these carrot cake cupcakes with cream cheese frosting a step further to make them "bird nests." Fun! The family appreciated my efforts to be festive. :)

The recipe I followed was really quite simple. The only step that took a little more time than usual was grating the carrots, but thanks to my food processor, it really didn't add that much time! Oh, and another great point about this recipe? It's Cooking Light! Check out the recipe here.

As you can see, the recipe calls for crushed pineapple and pecans, in addition to the grated carrots. I chose not to add the pecans (simply because I did not want my cupcakes to have a crunch to them). The pineapple is a fabulous addition to this recipe. It definitely makes the cake more moist, I think! Overall, this cake was pretty dense too, and I think that may also be attributed to the pineapple (and possibly the "weight" of the carrots too). The whole fam really enjoyed these cupcakes. They had just the right amount of sweetness to them, and both the carrot and pineapple flavors really came through. I love a moist cupcake, so these were top-notch in my book!


The batter doesn't look all that appetizing, but don't let that fool you. It tastes great, I promise. ;-)


I obviously had to use cute Easter cupcake liners!


I also toasted some coconut to use for the "bird nests," as you'll see shortly... It's super simple to toast coconut!


Mmmm, cream cheese frosting. It's always great to have a classic cream cheese frosting in your repertoire, so if you don't have one yet, I'd recommend this one! It was deeelish. Also of note, I only used about 2.5 cups of powdered sugar although the recipe calls for 3 cups.

Here's my little "decorating station" at my mom's kitchen table. :)


To make the "nests," I simply sprinkled some coconut around the outside of each cupcake and then placed a couple Cadbury mini eggs in the middle! You may recall that Cadbury mini eggs made it to an edition of my Friday Favorites a couple weeks ago. ;-) 


Too darn cute.


 Once again, Happy Easter, friends!


Thursday, March 3, 2011

Chocolate Stout Cupcakes with Kahlua Cream Cheese Frosting


Divine. Decadent. Heavenly. These are just a few words to describe the cupcakes I'm about to share with you... These aren't my own words but words of my coworkers who indulged in these cupcakes today at work as we celebrated a coworker's birthday. I have to agree with the adjectives they chose to describe these though; they are pretty amazingly delicious if I do say so myself!

As you can tell from the title, these cupcakes contain two kinds of booze...beer and kahlua. :) Good stuff, I tell ya. I really think that the stout beer enhances the chocolate flavor of the cupcakes in this recipe. The cupcakes themselves are very moist, rich, flavorful, and all around super tasty. Although I don't think the flavor of the kahlua came through in the frosting as much as I would have hoped, I have to imagine that it enhanced the deliciousness of the frosting too. Bottom line...booze in baking = a good thing.

I actually blogged about these cupcakes not far after my blog came into existence; you can read that post (it's brief!) here. I wanted to share them again though because I used a different frosting recipe this time AND because my blog has evolved quite a bit and I believe this recipe definitely deserves a lot more attention than I gave it the first time around!!

So, once again, the recipe I followed is one from Dave Lieberman of the Food Network. Read all about it here! Reviewers of this recipe on the Food Network site give it 5 stars, and I know that my coworkers and I wholeheartedly agree with that rating. The recipe says it makes 24 cupcakes, but I actually made 24 regular cupcakes, 12 mini ones, AND a small heart shaped cake (4" wide or so) with this batter. It makes a lot, folks!! You'll notice that the recipe calls for sour cream, but I chose to use light vanilla-flavored yogurt. Also, another small change I made was adding about 1 cup of mini chocolate chips to the batter. I mean, why the heck not?


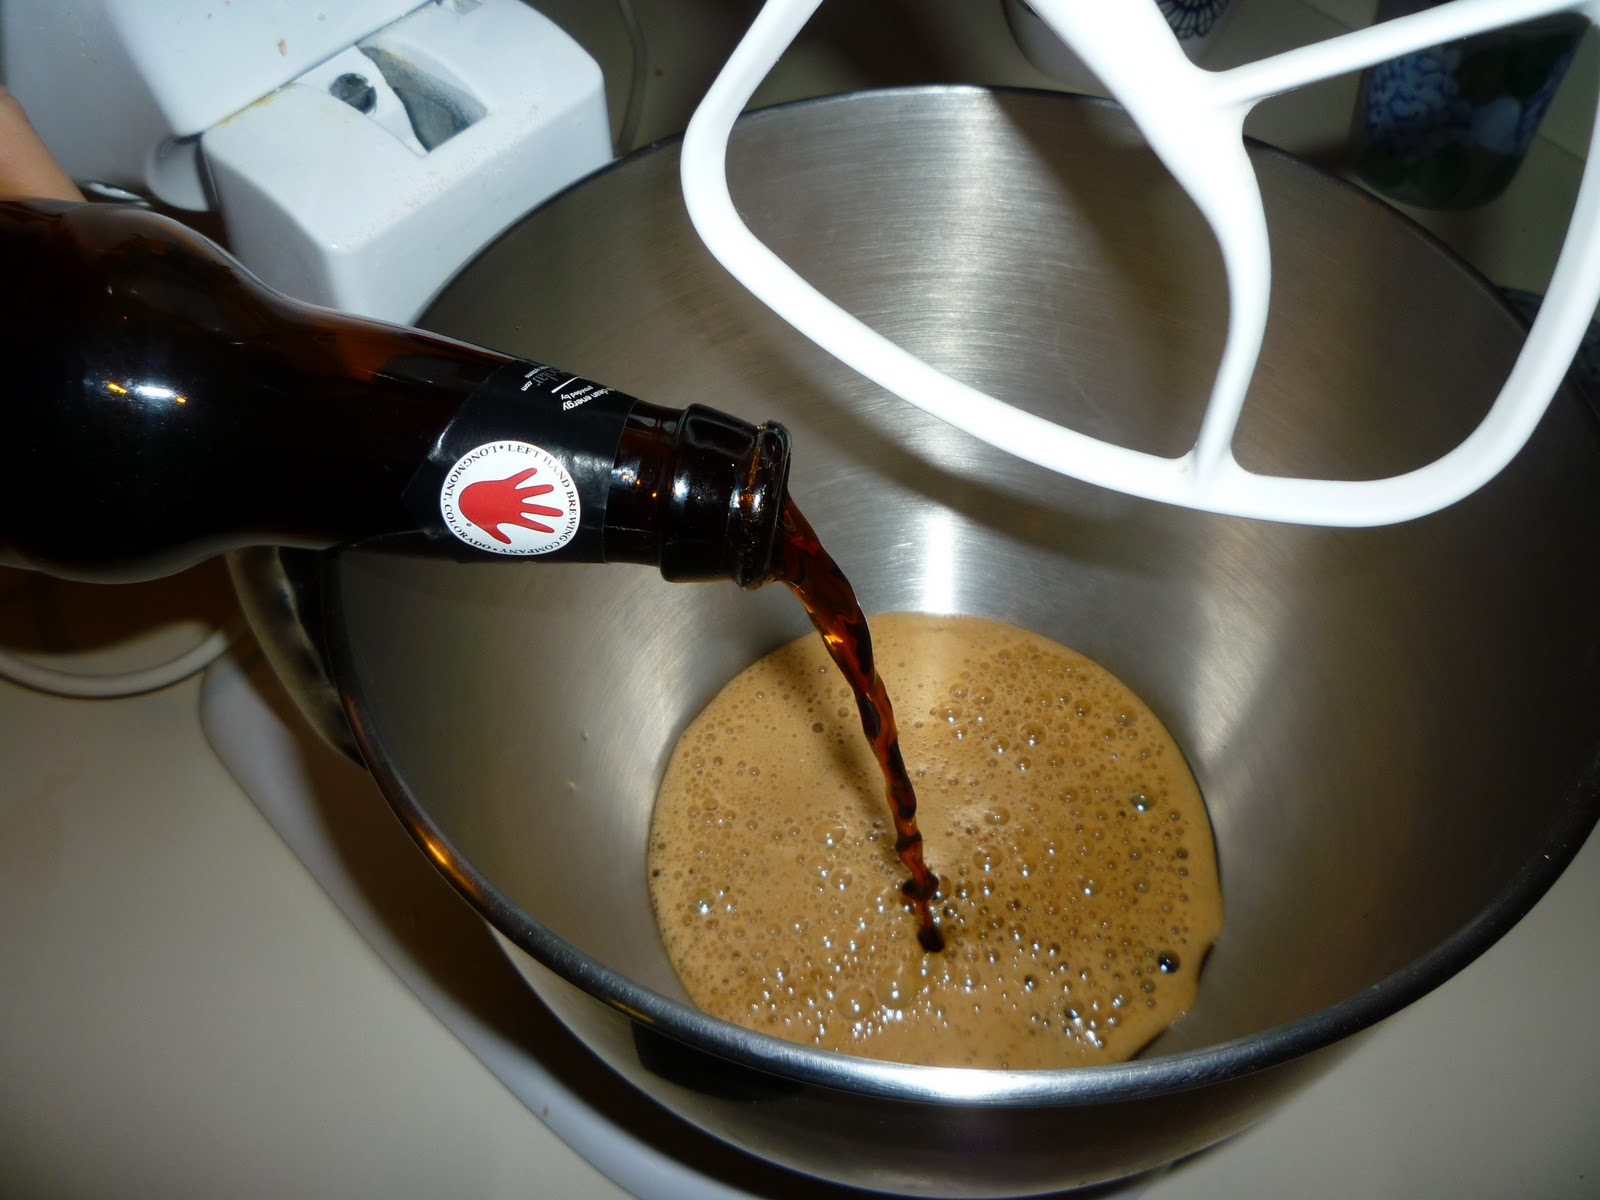
Although the recipe recommends using Guinness as the stout beer, I used a milk stout made by the microbrewery, Left Hand. Hey look - I'm even holding the beer in my left hand! Ha. I'm a dork.


This milk stout is a verrry good beer. It was a little difficult to pour it into the bowl and not drink it!!


Mmmmm, extra chocolate. :)


All baked and ready to be frosted!

I read several frosting recipes before deciding on the one I finally made. I have a bit of a problem when it comes to reading recipes and deciding on one to make... I spend a great deal of time perusing my cookbooks (I have a TON of them) and recipes online. I really enjoy reading recipes, but sometimes I spend too much time doing it because I just can't decide on what to make! Thanks to inspiration from a few different cupcake-themed cookbooks I have, here are the final ingredients I used for the frosting:

-1 stick real unsalted butter, softened
-8 oz. cream cheese (I used 1/3 less fat), softened
-2 to 2.5 cups powdered sugar, sifted
- approx. 2 to 3 Tbsp. vanilla flavored kahlua (I didn't measure it exactly; sorry!)

Beat butter and cream cheese with electric mixer; add in the powdered sugar and booze and continue to mix until everything is well-incorporated. Continue to add more powdered sugar, as needed, until the frosting reaches the desired consistency that you prefer! 


This frosting recipe made plenty to frost every last cupcake. And I still probably had 1/2 to 2/3 cup of frosting leftover. Looks like I'll have to find a use for that this weekend... Hmmmm, maybe use it as the filling for whoopie pies???

As you can see, I topped each cupcake off with a few mini chocolate chips as a "garnish." 


These cupcakes would actually be good for the upcoming holiday of St. Patrick's Day! The original recipe suggests using Guinness. If you used Guinness stout and tinted the frosting green with some food coloring, I think you'd be totally set for St. Patty's! ;-)


Here's a mini cupcake.... Delicious, I tell you!!

I actually had two other recipes I was intending to share with you in this post, but because these cupcakes got such rave reviews at work today, I decided to share this one sooner than later! Should you be curious, the current two recipes on deck are browned butter toffee bars and butternut squash mac n' cheese....  They'll be coming soon, I promise! Until then, go get yourself some stout beer and kahlua. Oh, and make these cupcakes with them. I suppose you could just drink them though. :-D

I also want to try a new St. Patty's recipe soon to share with you before the upcoming holiday. Maybe I can squeeze that in this weekend! In the meantime, you can read up on my traditional Irish soda bread from last year!

Saturday, December 18, 2010

Boston Creme Pie Cupcakes!


Yes, you heard me right - boston creme pie cupcakes!  Haha.  Everyone knows boston creme pie is actually a cake...but I decided to turn it into cupcakes!  I needed a fun and delicious recipe for a coworker's birthday that not only the guest of honor would enjoy, but all of my coworkers would as well!  These seemed like they'd be a decent choice...and they were. :)

I pieced this recipe together somewhat using a few different sources. I'll explain what I did next...hope you don't mind following along. ;-)

First, the cake! This is a "basic sour cream yellow cake" recipe from the good ol' Cake Mix Doctor. The ingredients:

-1 box (18.25 oz. yellow cake mix)
-1 cup sour cream (I used vanilla yogurt instead)
-1/3 cup vegetable oil
-1/4 cup water
-1/4 cup sugar
-4 eggs
-1 tsp. vanilla extract
-1 box instant vanilla pudding (just the powder) - this was my own addition to this recipe for an added vanilla flavor


Preheat oven to 350 degrees. With electric mixer, beat cake mix, sour cream OR yogurt, vegetable oil, water, sugar, eggs, vanilla, and instant pudding powder in large mixing bowl. Beat at low speed for one minute, then stop and scrape sides of the bowl. Beat again for two minutes at medium speed. The batter should look thick and smooth. Pour into prepared cupcake cups (either greased or lined with muffin cups) and place in oven.


My cupcakes took about 15 minutes to bake, so I'd recommend checking them after 15 minutes. The Cake Mix Doctor says they take 18 to 20 minutes. This recipe will likely make about 18 to 22 cupcakes for you!


Let the cupcakes cool completely after they're done baking. Then scoop out about a tablespoonful of cake (or so) from the middle to make room for the filling! I use a grapefruit spoon to scoop out the middle. Its serrated edges work perfectly for this purpose!


Next, the vanilla "creme" filling!

I have to admit; I used a shortcut here. I had read some recipes to make a true vanilla custard filling, but honestly, I just didn't have the time. So, instead I simply made some instant vanilla pudding! It worked great, I must say. :)  So for this step, just go ahead and prepare the pudding according to the instructions on the box. I made one box using skim milk.


Finally, the chocolate ganache topping...yummmm.

Check out this recipe cuz its ganache recipe is what I used. ;-)


And a couple tips for you regarding the topping... After the chocolate is fully melted, it's best to let it sit for a little while (probably 10 minutes or so) so that it cools and thickens a bit. I did stir it every couple minutes as it sat though, just to keep checking on its consistency. If you try to put the ganache/glaze on the cupcakes too soon, it won't stay on the cupcakes that well and will just drizzle down the sides because it's too thin and warm.  There will be some chocolate that drips down the sides of the cupcakes a little, but it should still be thick enough to stay on top really well too. The few drizzles down the side are kinda fun for effect, don't you think?


These cupcakes were a major hit at work for my coworker Jon's birthday. WOW, were these good. The cake itself was really flavorful on its own but then you add the vanilla "creme" filling and chocolate ganache on top?! Yikes. ;-)


Now go make yourself some of these...you know you want to!!!!