Sunday, March 17, 2013

Happy St. Patrick's Day, 2013! And Irish Soda Bread with Whiskey Soaked Raisins and Whiskey Butter Syrup

Happy St. Patrick's Day, friends!


I am quite Irish :) and I love celebrating St. Patrick's Day. Even though it seems as if Irish cuisine doesn't have the best reputation, I think that's silly. The Irish have some fabulous traditional foods! And Irish soda bread is absolutely one of them. In past years on the blog, I've shared with you Irish soda bread, Irish soda bread scones, and Irish soda bread cookies (!!). Well, this year I am sharing Irish soda bread again, but this time it's with a little twist. I soaked the raisins in whiskey for several hours before adding them to the dough, and I also made a whiskey butter syrup to put on the bread (the hubs was a big fan of both these changes!). Deeelicious.

The ideas for both the whiskey soaked raisins and the whiskey butter sauce came from A Cozy Kitchen (a fabulous blog). But, for the actual soda bread recipe, I used my go-to recipe that I've been using for a few years now - Ina Garten's (aka The Barefoot Contessa!). I just love her soda bread and haven't branched out from it because I love it too much!

Here are the ingredients for you, keeping in mind that the ingredients are from Ina Garten and the techniques for the whiskey soaked raisins and whiskey butter syrup are from A Cozy Kitchen.

Ingredients:

For bread:

-4 cups all-purpose flour (plus extra for raisins)
-4 Tbsp. sugar
-1 tsp. baking soda
-1 and 1/2 tsp. salt
-4 Tbsp. cold, unsalted butter (cut into 1/2" pieces)
-1 and 3/4 cup cold buttermilk, shaken
-1 large or extra large egg, slightly beaten
-1 tsp. grated orange zest
-1 cup dried raisins
-1/3 to 1/2 cup whiskey

For whiskey butter sauce:
-remaining whiskey-raisin liquid after raisins have been soaked in it
-2 Tbsp. unsalted butter

Instructions:

Combine the raisins and whiskey in a small, shallow bowl, cover tightly with plastic wrap, and let sit for at least six hours or overnight (I let mine sit overnight). When ready to make the bread, drain the raisins from the liquid (but SAVE the liquid for the whiskey butter syrup!).

Preheat oven to 375 degrees and line a baking sheet with parchment paper. Combine the flour, sugar, baking soda, and salt in the bowl of a stand mixer or a large bowl. Add the butter, and mix on low speed until the butter is mixed into the flour mixture. With a fork, lightly beat together the buttermilk, egg, and orange zest (if using; it's okay to omit the orange zest). With the mixer on low speed, slowly add the liquids to the flour/butter mixture until well-incorporated. Toss the raisins (that have been removed from the whiskey-raisin liquid) with one tablespoon of flour to coat them. Then add them into the dough. The dough will be rather wet.

Using a well-floured board, knead the dough several times, and form into a circle (you can make one large loaf, if you'd like - or two smaller loaves like I did this time - or you can make scones like I did in this blog post). Place the loaf or loaves on prepared baking sheet, and lightly form an X in the center with a knife. If making one large loaf, bake for 45 to 55 minutes. If making two smaller loaves, check on the loaves after about 30 minutes.

When the loaf is done, a cake tester inserted into the center of the loaf will come out clean. Also, if you tap on the side of the bread, it should sound hollow. Cool completely on a cooling rack.

For the whiskey butter syrup, add the remaining whiskey-raisin liquid to a small saucepan on the stove over medium heat. Once it's simmering, add the two tablespoons of butter. Turn the heat down to medium low and mix until the butter is fully melted. The mixture may begin to foam, and when it does, use a spoon to skim the foam off the top. Drizzle the remaining whiskey butter syrup on a slice of your freshly baked soda bread. 


In the past when I've made Irish soda bread, I've often made it with a combination of wheat flour and all-purpose flour. This time I decided to stick to just all-purpose. I actually think that 100% AP flour makes the bread slightly more flakey and delicious than with a mix of AP and wheat flours. Similar to the English muffin bread I posted last week, some things just taste better the classic way, I guess!


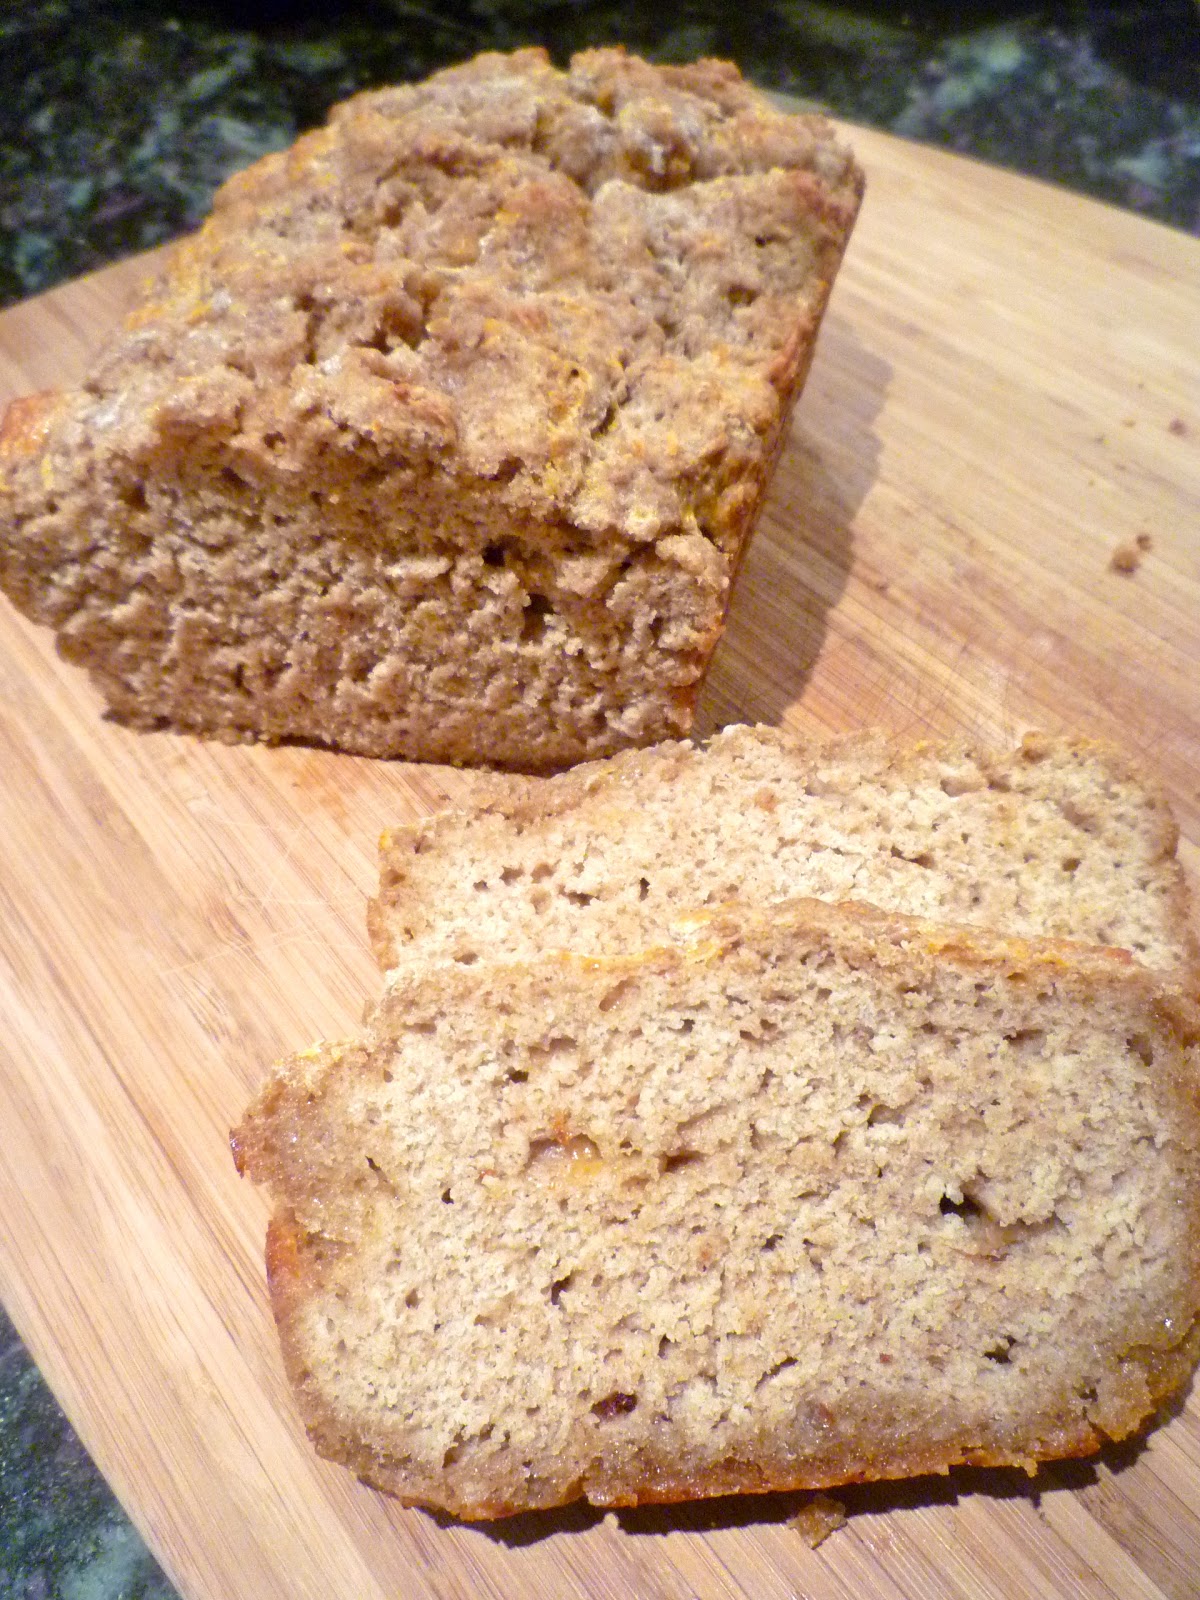
So buttery, soft, and flaky...

This soda bread is not dry, friends! Not in the least.


Now adding the whiskey butter syrup into the mix is a whole different story. Boy, is that stuff good! I made this bread yesterday morning, so Mike, my brother (who is visiting for the weekend), and I all tried it. And we all loved it! I was afraid I might not like it because I'm not a big fan of whiskey. But, not to worry, the syrup doesn't have a super strong whiskey flavor; i's only subtle. I served the bread warm, with a little bit of butter spread on it and then a little bit of the syrup drizzled over that... So. Good.

Oh, and in case you're wondering, the whiskey soaked raisins also did not have a strong whiskey flavor at all. But they were very moist, and I think the whiskey also brought out the raisin flavor more in the bread overall.


We're going to some friends' house this afternoon to have a whole meal full of St. Patty's Day foods, and I'll be bringing this second loaf with us. I can't wait to have many other Irish-themed foods today!


As you can probably tell, I didn't take photos of the bread until after we had already eaten part of one loaf. Oops. :)


I just realized I've been blogging a lot of bread recipes lately! Beer cheese bread, English muffin bread, and now this Irish soda bread. Didn't even realize I was on a bread kick, but apparently I am!


I hope you all have a fun, safe, and delicious St. Patty's today! :)

Thursday, March 14, 2013

English Muffin Bread (Recipe Re-Do)


I've got another "recipe re-do" for you this week! I love resurrecting old recipes on the blog. In case you weren't a follower way back when when I first posted these recipes, you'll get a chance to see some of my old favorites come to life again!

I originally blogged about this recipe for English muffin bread just over two years ago. It's funny to re-read that post because in it, I refer to Mike as my boyfriend. He's gone from boyfriend to fiance and then to husband since then! :)

I made this recipe this past week and was again reminded of HOW YUMMY this bread is. It's a recipe from my mother-in-law (also strange to say that  - but in a good way!). Mike adores this bread, and I can see why. I really need to remember to make it more often! It comes together very quickly, especially considering that it is a yeast bread. It's very simple and tough to mess up, I promise. If you're intimidated by yeast breads (I still am somewhat...), then this is the recipe for you!

Ingredients:

-5 to 6 cups flour (AP or whole wheat or a combo of the two)
-4 and 1/2 tsp. active dry yeast
-1 Tbsp. sugar
-2 tsp. salt
-1/4 tsp. baking soda
-2 cups milk (I used 1%, but others would work fine)
-1/2 cup water
-cornmeal to dust the loaf pans

Instructions:

Prepare two loaf pans (8 x 4 or 9 x 5) by spraying with cooking spray and sprinkling with cornmeal. Set aside.

Combine 3 cups of the flour, sugar, salt and baking soda in a large bowl. Heat the milk and water together on the stove until warm (about 120 to 130 degrees F). Add the liquids to the dry ingredients and mix well. Stir in more flour, by the 1/2 cup or so, to make the dough stiffer, until you reach the total of 5 to 6 cups of flour (remembering that you already added 3 cups to start!). You may mix this dough by hand, or you can use a food processor. I prefer to mix it by hand (just so that I don't dirty more dishes). But if you do mix it by hand, you should knead it for a few minutes before putting it in the pans. If you use a food processor, you can skip the kneading.

Divide the dough in half, and spread each half into each of the two prepared pans. Cover and let rise in a warm place for at least 45 minutes. Preheat oven to 400 degrees. When the dough is done rising, bake in the preheated oven for approximately 25 minutes (but oven times may vary, so I'd recommend you check your bread after 20 minutes). Let cool in pan for 10 minutes or so, and then remove breads to cooling rack to cool completely.


See that green knife? It's the best bread knife I've ever had! Really. The Best. We love it.
It's this one.

You may be able to tell that I took pictures of this bread after Mike and I had already eaten part of one loaf (it's not just that the loaf in the bottom of the picture is significantly smaller ;)). We just couldn't keep our hands off it when it was out of the oven!!


When I made the bread this time, I used a mix of half all-purpose flour and half whole wheat flour. Mike said to me this week that he actually prefers the bread with all all-purpose flour as opposed to the mix of the two flours. He said it tastes a bit more "classic" to him if it's made with just all-purpose. Sooo, next time, I guess I'll be making it that way! That's not to say he doesn't love it this way, though. He assured me that he does. :)


This bread is amazing if you toast it! I love it with a little bit of butter. I've also been enjoying a couple slices each morning this week with some peanut butter. Jam is fabulous as well! Honestly, you can't go wrong with any topping on this bread.


We seriously love this bread. I really hope you will try it - I just know that you will love it too!!


Have a fabulous weekend and St. Patty's Day, friends! If you need any last minute ideas for recipes, check out my St. Patrick's Day recap from last year.

P.S. This bread recipe is linked up to Taste and Tell Thursdays. :)

Tuesday, March 12, 2013

Beer Cheese Bread


It's no surprise to most of you that beer plays a significant role in my life (see Exhibit A: homebrew as wedding favors ;)). And although I enjoy drinking good craft beer, I also enjoy baking with it! I have posted a beer bread recipe on the blog before, but this one is different. It's actually much more basic in terms of its ingredients. And it is oh-so-delicious! I think this recipe should become a staple in our kitchen. It comes together in no time at all and is the perfect dinner accompaniment or breakfast treat.

This recipe isn't from anywhere in particular. There are so many beer bread recipes floating around the internet; I just took the basic ingredients that seem to be in so many of them and put them together for this one!

Ingredients:

-3 cups flour (I used half whole wheat and half AP)
-2 Tbsp. sugar
-1 Tbsp. baking powder
-1 tsp. salt
-1 bottle (12 oz.) beer (again, your choice)
-1/2 to 3/4 cup shredded cheese (exact amount and flavor of cheese are your choice)
-4 Tbsp. melted butter (salted or unsalted is fine)

Instructions:

Preheat oven to 350 degrees and grease a 9 x 5 (or 8 x 4) loaf pan.

In a large bowl, whisk together the flour, sugar, baking powder, and salt. Using a spoon or spatula, mix in the beer until well-incorporated (it will likely be foamy at first, but it will settle down and incorporate nicely after a little time). Next, stir in the shredded cheese.

Pour batter into prepared pan, and then drizzle the melted butter overtop. Bake for 40 to 60 minutes (baking time will vary per oven) or until a toothpick or knife inserted into the center comes out clean. Let cool in pan for 10 to 20 minutes before removing to cool completely on cooling rack.


For this particular bread, I used a beer that we had in the house - a Mayflower Autumn Wheat Ale. At any given time in our house, we have SO many beers, so it was hard to choose. I knew I wanted something slightly maltier and less hoppy (even though I looove my hops - IPA's tend to be my go-to beer style to drink). But for this bread, I just didn't feel like hops for some reason. Anyway, the autumn wheat ale from Mayflower worked out well (it's a darker wheat than most). And also, another reason I chose this beer was simply because it's been at our house since Mike's bachelor party last September (his brother did an awesome beer tasting event at the party, but there were some beers leftover), so I figured it was time for it to go! The cheese I used was a blend of three different cheddars.

Feel free to experiment and try different beer styles when you make this bread. And the same goes for the cheese...and you also don't even have to add the cheese at all if you don't want to!


In my opinion, this bread tasted better 2 or 3 days after I made it. The day I made it, we ate it with some homemade chicken soup, and it paired perfectly with the soup. However, I thought the overall flavors of the bread were more enhanced a couple days later... Guess the bread had to sit for a bit for the flavors to really come through!

And the melted butter adds a nice flavor and gives the top and sides of the bread a slight crunch (very slight, but noticeable!). It's almost like the bread has a very thin crust. :)

Sorry for my not-so-great photos. I took these at night in our kitchen, and our lighting is really not great for food pictures!


Beer. Cheese. Bread.

What's not to love?!

Friday, March 8, 2013

Breakfast Pizza (Recipe Re-do)

Haaaaaappy Friiiiiiday, all!

Can you tell that I'm excited the weekend's almost here?


Today I'm sharing with you a recipe that has already been on the blog - breakfast pizza. If you click on this link to go to that post, you can see that it's been quite some time (close to 3 years!) since I blogged about breakfast pizza. And you know what? I also have not made it again since then. Terrible! This is such a wonderful recipe; it's a shame I haven't made it sooner. But now that we recently made it again and have been reminded of how great it is, I know that we'll be making this more often going forward...

One of the nice things about this recipe is one of the same nice things that comes with making pizza for dinner... You have flexibility to add whatever ingredients you'd like! Now, granted, part of what makes this pizza great for breakfast is that it involves eggs, so I do not recommend that you skip the eggs. In my opinion, that's pretty much the main thing that makes this recipe awesome. But otherwise, you can add any other ingredients that you enjoy most! This time around, we added bacon (which we had cooked prior to putting it on the pizza), caramelized onions, tomato, and of course, cheese.

The original recipe I followed a few years back is from Smitten Kitchen. It is very simple! You can make your own dough if you'd like, or just use store bought dough (which we did; we used Whole Foods wheat pizza dough). All you do is simply put your ingredients on the dough as you normally would, and then you crack your eggs over top of the pizza (i.e., the eggs go on last). I sprinkled some ground pepper over top the pizza at this point too.

Bake the pizza at 400 degrees until the eggs are cooked to your liking. This time around, it took a good 16 to 18 minutes for the egg yolks to cook through, but last time I made this, it didn't take quite as long. So, bottom line - keep an eye on this as it bakes. We actually slightly overcooked the eggs this time - oops. We enjoy our eggs slightly runny, and although they were still slightly runny in parts, the egg yolks cooked through a bit more than we anticipated. Oh well! It was still SO good.


Forgive me, but I didn't take too many pictures of the pizza. We were too focused on eating it!!

Here's one slice that I ate (took the photo after I had a small bite first ;)).


A slice that our friend Mary (whom we had over for brunch when we made this) enjoyed...
  

...and a slice that Mike had! Notice that his is topped with smoked salmon. Love smoked salmon! We didn't put the salmon on the pizza before baking since we didn't want it to cook. Instead, we put it on after the pizza was fully done.


This is absolutely a breakfast/brunch recipe that you need to try if you like pizza and you like eggs. It comes together in no time, and it's great for entertaining. And, it's FUN!

Have a great weekend! :)

Wednesday, March 6, 2013

Wedding Wednesdays: Bridesmaid Dresses & My Girls :)

Welcome back to Wedding Wednesday! I missed my post last week, but this week I'm back in action. :)


I was so fortunate to have three beautiful ladies by my side on our wedding day in November. From left  to right in the picture above, there is my college friend Kristen, my sister and maid of honor, Melissa, and my cousin Megan. All very special, wonderful ladies!!

Back when we were engaged and in the midst of wedding planning (which, honestly, feels like ages ago now!), I had a lot of fun browsing tons and tons of different styles of bridesmaid dresses online. My oh my, there are so many choices out there! In the end, the gals and I shopped together in person (so glad we could all go together!) at Alfred Angelo and David's Bridal. The style we went with was from Alfred Angelo (this style). 

I knew I wanted a dress that was burgundy in color, but I wasn't sure about the length... There was another dress at David's Bridal that actually had very similar details/style on the top, but it was tea length, not full length, like the ones we ended up going with. In the end, I slightly preferred the full length dresses (it felt more like a "November" dress and it would keep the girls a tad warmer than a shorter style would), and I also loved the detail on the back of these dresses (which the David's Bridal dress did not have).


So pretty and elegant...

For shoes, I asked the girls to wear silver, but they chose whichever style they wanted. The day before the wedding we all went to get pedicures together, and I love that they all chose the same toenail color - one that would match their dresses! :)


I thought that the ladies looked beautiful in their dresses, but let's be serious, they would look beautiful in any dress! :)


Walking up the steps to the church, with my favorites by my side...


Looking back at photos and thinking about memories of the day, I am very happy with our choice for the bridesmaid dresses. The style and color really fit the whole day, the setting, the time of year, etc. so well, I thought...

I'm not sure what was said in this picture below, but clearly, someone said something funny! This was right after the ceremony after we exited the church. Love it.


Our wedding day was quite cool (in the mid-30's, 40 degrees tops), and it was also very windy, which made it feel much cooler! Everyone in our bridal party was a trooper though and withstood the cool temperatures and winds for our photo session outside. They are the best!


Mike and I are very blessed to have such special friends and family in our lives... ♥
  

The gals were smart and brought coats out to the photo shoot to warm up when they could!

And in case anyone is interested, the groomsmen's tuxes were from Men's Wearhouse. They were able to match the ladies' dresses perfectly!

You can really tell it was windy in this photo below. Phew! I love this photo though and our dresses blowing in the wind... It helps me maintain vivid memories of how special our day was and all the wonderful emotions that come with it. :)


As a gift to the girls, I gave each of them the chance to make their own purse/handbag at 1154 Lill Studio in Boston. If you haven't heard of Lill before, you have to check it out! I am in love with this company and their bags. You can go to their store (they have store locations in Boston and Chicago) to design your bag, or you can design your bag online. They have so many different shapes, sizes, and styles of bags and endless fabrics! It is such a fun experience to design your own bag. I may or may not have a few Lill bags of my own that I've designed over the years... I have a thing for bags. ;)

I'm glad we were able to snap a photo of all of us and the bags we designed for the wedding day!


 So there you have it, a look at the bridesmaid dresses and my beautiful, special bridesmaids! Thanks for tuning in to another edition of Wedding Wednesday. :)

Will have another recipe for you at the end of the week!!

Sunday, March 3, 2013

Double Chocolate Fudge Cookies


Like chocolate? Me too.

And I know you're going to love these double chocolate fudge cookies. They are an incredibly easy cookie to make; you don't need a mixer, you don't need to wait for butter to soften, and the recipe calls for ingredients that are likely already in your pantry (i.e., no extra trip to the store needed!!). If you have a craving for a chocolate cookie, you can seriously whip up a batch of these little guys in no time at all. Another great characteristic of these cookies? The recipe doesn't call for eggs! That's right. No eggs. And you know what that means... You can safely eat the cookie dough. ;)

The recipe is from a cookbook, All-New Complete Cooking Light Cookbook. I have so many cookbooks, and I'm trying to make a point of using them more often. I was browsing through this particular cookbook in search of an easy cookie recipe, and when I came across this recipe, I knew it was worth a try. Cooking Light calls them "cocoa fudge cookies," but I decided to call them double chocolate fudge cookies. The original recipe does not call for the addition of chocolate chips, but I couldn't resist adding some, so I added some Hershey's dark chocolate chips to the batter... And I am glad I did!! If you'd like a basic, yet amazing, plain chocolate cookie, feel free to make this recipe, omitting the chocolate chips. 

Ingredients:

-1 cup all-purpose flour
-1/4 tsp. baking soda
-1/8 tsp. salt
-5 Tbsp. unsalted butter
-7 Tbsp. unsweetened cocoa powder
-2/3 cup granulated sugar
-1/3 cup packed light brown sugar
-1/3 cup plain or vanilla low-fat yogurt
-1 tsp. vanilla extract
-3/4 to 1 cup dark chocolate chips
(depending on your preference for amount of chips in your cookies)

Instructions:

Preheat oven to 350 degrees. Line cookie sheets with parchment paper and set aside.

In a small bowl, combine flour, baking soda, and salt; set aside. Melt butter in a saucepan over medium heat. Remove from heat, and stir in cocoa powder and both sugars. Stir in yogurt and vanilla. Add the flour mixture to the butter mixture, stirring until moist. Mix in chocolate chips, if using, until well-distributed throughout the dough.

Drop by tablespoonfuls onto cookie sheets, about 2 inches apart. Bake at 350 degrees for 8 to 10 minutes or until cookies are almost set. Let cool on minutes for 2 or 3 minutes or until firm. Remove from cookie sheets and cool completely on cooling rack. Makes approximately 2 dozen cookies.


These cookies are very chewy and fudgy, just what I love in a chocolate cookie. And they puff up nicely while baking too, so although they're fudgy, they're also light and airy at the same time...


And of course, they're quite chocolate-y too. :)


Imagine a couple of these with a nice, cold glass of milk....


There's really not too much else to say about these cookies! They speak for themselves. And once you try them, you'll see what I mean. :) 

Have a great start to your week, everyone!

P.S. I've linked this recipe up to Taste and Tell Thursdays!

Thursday, February 28, 2013

Chocolate Oatmeal Cranberry Energy Bites


Ever have those days when it feels like no matter how much or how often you eat, you're still hungry? 

Yes?

Me too.

I don't love those days. I tend to be someone who eats small amounts every couple or few hours throughout the day...so, for me, smaller (but filling!) snacks are awesome. I love a "little something" that will tide me over until the next time I eat (and I don't like feeling hungry!). I even have what I call my "snack bin" at work in my office; it's a large rubbermaid container filled with healthy snacks that I can go to during the day if what I ate for breakfast or lunch isn't quite enough. Now, these chocolate oatmeal cranberry energy bites wouldn't go in my snack bin at work (since they're stored in the fridge ;)), but they fit perfectly into this idea of a small snack that will help fill you up and make you last until your next meal! Just make sure you don't have too many at once... They are incredibly tasty, so there's a good chance you'll be tempted to eat several in a row!

The recipe is adapted from My Blessed Life. I changed my version slightly from the original recipe, and I also halved it when I made these. For me, the proportions listed below made 12 bites. So, if you double it, you'll get a couple dozen! Next time, I definitely want to make the full batch, not just half!

Ingredients:

-1/3 cup peanut butter
-1/4 cup honey
-3/4 tsp. vanilla
-1/2 cup regular oats
-1/2 cup coconut flakes (sweetened or unsweetened will work)
-1/8 cup cocoa powder
-1/4 to 1/3 cup dried cranberries
-1/4 to 1/3 cup mini or regular chocolate chips

Instructions:

Mix peanut butter, honey, and vanilla in a medium bowl. Add remaining ingredients and mix together until evenly combined. If needed, use your hands to mix everything! Form mixture into 1-inch balls, using your hands. Store in an airtight container in a fridge for up to 1 week.

Makes about 1 dozen energy bites.


A few other notes for you about this recipe...

The original recipe called for even amounts (1/2 cup of each) of walnuts, cranberries, and chocolate chips. As you saw above, I did not add the walnuts though; instead, I added about 1/3 to 1/4 cup each of cranberries and chocolate (remember that I halved the original recipe). This recipe definitely leaves room for changing it up, which I love. So feel free to add other ingredients that you might like!

Also, the original recipe called for refrigerating the mixture for 30 minutes before shaping it into balls. I did not do that, and it worked just fine. Oh, aaaand, when you're forming the mixture into the balls, there's likely going to be some little bits of the different ingredients left in the bottom of the bowl. You may just have to nibble on those yourself...


These are also a perfect little snack before going out for a run or working out. And they also make a great dessert!


These treats are pretty sweet overall, but not too sweet!


I love these little guys!

They remind me of two other similar treats I've posted on the blog before too:


You may have noticed that I didn't have a Wedding Wednesday post for you this week. Oops! I just didn't have the time to get one together. But don't worry; these series will continue. It's not over quite yet!