Showing posts with label butternut squash. Show all posts

Thursday, February 2, 2012

Bean and Butternut Squash Chili (Crock Pot Recipe)

Helloooo! I've been meaning to write this post since Tuesday, but alas, time has slipped away from me. What a busy week!


Speaking of busy weeks, this recipe for bean and butternut squash chili is perfect for a busy week. There's nothing quite like coming home from work, walking in the door, and smelling the delicious aromas of dinner that's been cooking slowly in the crock pot all day long. Mmmmm. It's one of my favorite food "experiences"! Sadly though, I don't cook enough with my crock pot. I really need to make more tasty meals with it!

I was a big fan of this chili when I made it last week. But you know what? I became even more of a big fan of it when I ate it as leftovers. This was one of those dishes (in my opinion) that's better the day after! I made this last Thursday, I believe, and I just finished up the leftovers this week. Soooo good! This hearty, flavorful chili, paired with a delicious slice of When Pigs Fly bread (their best-selling baby spinach, onion, and garlic ciabatta), was my lunch on Monday, Tuesday, and Wednesday this week. And nope, I didn't get sick of it. That's the sign of a good recipe. :)

The original recipe was posted on the blog Perry's Plate, and the recipe was actually a guest post by another great blog, Budget Gourmet Mom. The ingredients posted below are what I used (slightly different than the original). I ended up adding some chopped green pepper that wasn't in the original recipe. Otherwise, I followed it almost exactly with just a couple other slight changes!

Ingredients:

-1 20-oz. package butternut squash
-1 medium onion, diced
-1 medium green pepper, diced
-2 jalapeno peppers, finely chopped
-olive oil
-1 15-oz. can black beans, rinsed and drained
-1 15-oz. can white beans, rinsed and drained
-1 14.5-oz. vegetable or chicken broth (low sodium, if desired)
-1 16-oz. bag frozen corn
-2 Tbsp. chili powder
-salt and pepper


Instructions:

Heat olive oil in a large skillet over medium heat. Saute the onion, pepper, and jalapeno pepper for a few minutes. Add the butternut squash and saute until slightly tender.

Pour the sauteed vegetables into your crock pot. Add the rest of the ingredients and stir until well-mixed. Season with salt and pepper. Cook on low for 6 to 8 hours. Serves 6 to 8.


I cooked mine on low for closer to 9 to 10 hours, and it turned out just fine. I also sauteed the veggies the night before, let them cool, and kept them in the fridge overnight before putting them in the crock pot early the next morning. As I mentioned, the addition of the green pepper was not in the original recipe, and I also added two jalapeno peppers instead of one. Also of note, in my opinion, this chili was a little heavy on the corn. When I make it again, I think I might only add 8 or 10 ounces of a bag of frozen corn instead of the entire 16 ounces. I also think you could easily add other veggies too like other types of squash or peppers.

As I mentioned above, for some reason, this chili tasted better to me the next day (and on subsequent days when I continued to enjoy the leftovers). I'm not really sure why! Sometimes I guess it just seems that a recipe benefits from "sitting" longer and letting the flavors meld together better.

As you can see, there are two "sets" of pictures of this chili. The ones of the chili in the green bowl I took the night I made this chili. And the other ones in the white mug are of when I ate the chili at work for lunch. I'm obviously not an experienced photographer, nor do I have great camera equipment or any special lighting, so I do apologize for the less-than-perfect pictures! But trust me, despite how this chili looks in the photos, it's quite a tasty recipe!


Hope you all have a wonderful weekend and enjoy the Super Bowl! Did you know that the average American consumes four chicken wings on Super Bowl Sunday? I did not until I heard that on the radio today (if it is, in fact, true). Mike and some friends and I plan to munch on various goodies during the game, including homemade pizza. I am thinking that one of the pizzas we make has to be shaped like this one. How fun is that?? And if you're not a pepperoni person, you could easily do sliced tomatoes or something in place of the pepperoni. I found some great Super Bowl appetizer ideas on Pinterest this week!


(photo source)

Gooo Giants! And yes, I live in Boston now, but the first 22 years of my life were spent in New York State so I'm rooting for the Giants. :)

Enjoy your celebrations, friends!

Wednesday, January 4, 2012

Root Vegetable Pizza with Sweet Potato, Rutabaga, Onion, and Acorn Squash


Who doesn't love eating pizza? And who doesn't love eating pizza that's both delicious and healthy? I'm pretty sure we all love pizza (if you don't, please do forgive me for making assumptions ;)), and I have another pizza recipe for you here today that you're bound to love. The inspiration for this pizza came from the fact that I had sweet potatoes and a rutabaga in the house that I wanted to eat up. With veggies like these, I'd typically roast them and eat them as a side dish with dinner or put them on top of a salad. The other day, though, those two ideas seemed boring to me. As I was brainstorming what else I should do with them, it hit me. Make pizza, of course! Just about any vegetable works on pizza really...well, according to the Barbershop rules of the kitchen anyway. :)

I bought whole wheat pizza dough at Whole Foods so I'd have a healthier dough as the base for my delicious pizza pie. I roasted my sweet potato, rutabaga, and onion in an oven around 400 degrees or so. All the veggies were drizzled with olive oil and sprinkled with salt, pepper, and dried rosemary. I had actually roasted the acorn squash a few nights earlier so I only had to roast the other three. On top of my pizza dough, I spread a thin layer of canned tomato sauce and then the veggies. I then sprinkled some shredded mozzarella cheese and baked the pizza for about 10 - 12 minutes or so at 400 degrees (my oven cooks quickly; I think it might normally take a bit longer than that).

Oh, and in case you were wondering, before roasting the veggies, I chopped the rutabaga into 1/2-inch pieces (as pictured below) and the sweet potatoes into round slices that were maybe 1/4-inch thick. I don't peel my sweet potatoes before roasting them, but you're more than welcome to peel them if you don't care for the skin. You do have to peel a rutabaga before chopping or slicing though - just an FYI if you've never cooked with rutabaga! I hadn't ever cooked with one until we got one in our CSA last fall.


What here doesn't belong??


Whoops! Guess I snuck in a picture of the other pizza I made the same night. This one was more classic - peppers, mushrooms, and tomatoes. Also a winning veggie combo!


Deeelish! I was so in love with this pizza. I've been enjoying leftovers for lunch at work the past two days too. Leftover pizza's the best and it's even better when it's full of yummy root veggies!

Happy mid-week, friends. :)

Wednesday, October 5, 2011

Blogging Speed Bump & Fall Treats!

I've hit a blogging speed bump, friends. No, it's not that I have a lack of recipes to share with you. It's that I don't have a home laptop at the moment with which to share my recipes! I have been without the laptop since last Thursday, and as a result, I haven't been able to blog about the delicious fall recipes I've been making. Sadness! :(  I suppose I could put all my food pics on my work computer and blog here, but I'm going to hold off on that (I am blogging right now at work though - whoops! I'm done work for the day though ;-)).

So I thought I'd just briefly tell you about a few things I did recently make...


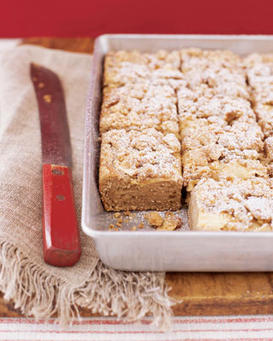
A delicious recipe from Martha Stewart! They are SUPER moist and yummy.

2) Apple Crumb Muffcakes

I am calling them muffcakes because I have eaten one both for breakfast and for dessert. So, they're really a combination of a muffin and a cupcake. ;-)

I don't have a picture for you, but let's say they look something like but this in muffcake form:


3) Butternut Squash Apple Soup!

I took this pic with my phone the other night. It's not great, but it's something! I loosely followed (from memory) the recipe for this soup that I posted on the blog last year.


How awesome is the plate I used for my toasted slice of When Pigs Fly bread? I got the Six Grain & Pumpkin Seed kind. Aaaamazing.

Oh, and today I found this recipe for apple pie pop-tarts with cinnamon glaze. Helloooo! These look so delicious and fun! I really want to make these...


(photo from The Baker Chick)

I hope to return to you next week with the real recipes I've been making! There's a good chance I won't post a Friday Favorites this week either. Sorry. :(

Hope everyone's having a fabulous October so far!

Wednesday, September 21, 2011

Baked Apricot Maple Chicken with Sauteed Apples and Roasted Butternut Squash

Is it just me or does the name of this recipe scream fall? Yay for autumn! It's officially just two days away. Come Friday, we'll be into my favorite season... Woohoo!

I made this dish last night to bring to a small dinner party with six people. It was the perfect amount for everyone! A few people had second helpings, and by the end, the entire dish was gone.... So, I guess it was yummy?! :)

I receive several cooking magazines and I love reading them. However, I will admit that I'm guilty of not making recipes from my magazines very often. :( I am making an effort to use recipes from my magazines more often, and this dish is an example of that effort! Of course, though, I did change the recipe... It's actually originally a recipe for pork, but I chose to use chicken instead because it was on sale at the grocery store! Pork was not on sale this week. I like to save money whenever I can; what can I say?


The dish is from the September 2011 issue of Cooking Light, and in there it's the recipe for "roasted pork tenderloin and maple-glazed apples" (for any of you Cooking Light subscribers!). I'll share the recipe as I made it though. Most of the measurements are approximate...I didn't really measure. Sorry! This is so not how I bake. I'm much more precise in that area. ;-) Oh, and I chose to just add the squash as a little extra since it went so well with all the other flavors.

Ingredients:

For chicken:
-approximately 2.5 - 3 lbs. chicken breasts
-approx. 2 Tbsp. extra virgin olive oil
-approx. 1 - 2 Tbsp. white wine vinegar
-approx. 3 Tbsp. pure maple syrup
-approx. 3 Tbsp. apricot jam (or another jam of your choice!)
-salt and pepper
-fresh rosemary, thyme, and/or other herbs

For apples:
-3 or 4 medium apples (I used macintosh)
-1 small yellow onion
-1 Tbsp. butter or margarine
-3 Tbsp. pure maple syrup
-1 Tbsp. fresh lemon juice
-salt and pepper
-cinnamon

For squash:
-1 lb. butternut or winter squash (I used a combination of these two types), peeled and chopped into 1/2 - 1" cubes
-extra virgin olive oil
-salt and pepper
-fresh rosemary

Instructions:

Prepare your chicken and squash first so they can be roasting while you're cooking the apples on the stovetop. Preheat oven to 375 degrees. For the chicken, I cut the breasts into 1/3 - 1/2 lb. pieces and put them in a 13 x 9 glass baking dish (I had sprayed it with cooking spray first). In a small dish, combine the olive oil, vinegar, maple syrup, jam, salt, and pepper (use your judgment with how much). Once the liquid mixture is combined thoroughly, spread it evenly with a spoon over top the chicken breasts. Sprinkle fresh rosemary and thyme (or other herbs!) on top of that. I probably used a couple teaspoons of each of those two herbs. Bake the chicken for about 20 - 25 minutes or until cooked thoroughly and not pink in the middle. Cooking time will vary depending on the size of the breasts you prepare. Just be careful not to overcook so the chicken doesn't become dry! 


For the squash, place it in a baking dish and sprinkle with olive oil and your chosen spices. Bake for at least 30 minutes - maybe up to 45 minutes. The cooking time will vary here depending on the size of the squash pieces you cut. Check the squash's doneness by sticking a fork in it; if it goes through easily, it's done! Oh, and by the way, quick tip on peeling a squash such as this one pictured below... These things are so darn annoying and difficult to peel! It can be made easier if you microwave the squash first. Pierce it with a knife in a few places, and for a smaller squash like this one, just microwave it for 2 or 3 minutes, let it cool for a bit, and then use your knife to carefully cut off the outside peel. It will be soooo much easier if you microwave it than not. I promise!


While those two items are baking, prepare your apples. I kept the skins on my apples, but if you'd like, you can remove the skins. Cut each apple into 8 or 10 slices. Chop your onion into small pieces. In a large skillet over medium heat, melt the butter or margarine and saute the onion for 7 or 8 minutes until it starts to soften. Once the onion is getting lightly browned, add the apples to the pan. After a minute or so, drizzle the maple syrup over top, along with the lemon juice, salt, pepper, and cinnamon. Continue to cook the apples over low to medium heat for 6 - 8 more minutes, or until they're softened to your liking.


When everything has cooked, serve it however you'd like! I ended up combining the squash and apples into one dish when we actually sat down to eat. We enjoyed this meal with some When Pigs Fly harvest bread and a delicious side dish of quinoa, sweet potatoes, and dried cranberries made by the lovely Jenn. What a perfect fall meal!!


Monday, March 21, 2011

Healthy Butternut Squash Mac & Cheese


Alright, friends, I've got a delicious dinner recipe for you! Since starting the blog, I have to say that I've developed a greater interest in cooking than I previously had. Don't get me wrong...I've always enjoyed cooking. Most days though I'd still prefer baking over cooking; however, the blog has been a great venue for me to expand my interests in the kitchen! As a result, I take more time to choose different dinner recipes to try...and every now and then I get to share one of those yummy dinner recipes with all you readers out there. And this butternut squash mac and cheese recipe is definitely one of those yummy dinner recipes!!

I had bookmarked this recipe quite some time ago, but only got around to making it last month in February (yes, I am waaay behind in my blog posts! some get put on the back burner for a while...er, no pun intended there with the back burner reference ;-)). This mac and cheese recipe comes from a great blog/website called Simple Bites. As Simple Bites describes itself, it is a "family-oriented community dedicated to all things food and drink." I like it! If you have a few minutes, you should check it out.

This recipe was really straightforward. Nothing too difficult! And it's pretty healthy too as far as mac and cheese recipes go! Some of the "cheese" comes from the butternut squash, so it uses less cheese than other recipes. I LOVE butternut squash myself, and although the squash flavor is not overwhelming in this dish, it is noticeable. I would bet money on the fact that non-squash lovers would easily eat a whole helping of this mac and cheese. ;-)

You can read the recipe I followed here. For the most part, I followed the recipe as is. A few changes... I did not use organic whole milk, but regular skim milk (which worked great!). I also did not use the dijon mustard, simply because dijon isn't my favorite flavor. For the cheese, I used a combination of Vermont extra sharp and a Mexican 4 cheese blend, pictured below.


For my pasta, I chose to use Ronzoni's Healthy Harvest whole grain fusilli pasta. I used the entire 13.25 oz. box that you see here.


Now, for the butternut squash, I kept it simple and used a 12 oz. package of frozen butternut squash that I thawed in the microwave. The recipe calls for 1 and 1/3 cups butternut squash puree that you make by actually cooking and pureeing squash. However, I had previously used frozen butternut squash that tasted great in this AMAZING butternut squash dip, so I figured I could use it for this recipe too! And it worked perfectly.


Finally, for the topping that calls for bread crumbs, parmesan cheese, and coconut, I omitted the coconut and only used the bread crumbs and parm cheese. 


Onion! I added some thyme to the onion also.


Pasta.


This is the onion, flour, and milk mixture with the butternut squash, before I mixed it in.


Now it's all mixed!


Time for CHEESE. Oh, I also added a small handful of parmesan here.


Stir it all up! The recipe calls for adding salt and pepper here, but I only added pepper. I also snuck in some more dried thyme here.


Ready for the oven! As you can see, I used two baking dishes (each is roughly 8 or 9 inches square). This makes a lot of mac n' cheese!!


Mmmm, nicely golden brown on top... :)


Delicious.


I served this with a side of roasted broccoli, Al Fresco all-natural chicken sausage (a delicious brand if you've never tried it!), and some homemade spent grain bread. A complete, healthful, and super tasty meal!!

This is a very hearty mac n' cheese that probably could stand as a nice meatless main dish on its own. It is a great family meal, sure to please kids and adults alike!! What's not to like? It's a healthy version of a comfort food. Heck, I should be saying, "what's not to love?" with this one. ;-)

Thursday, February 3, 2011

Butternut Squash Dip


Greetings and happy February! I have a fun recipe for you here that doesn't involve baking! In fact, it doesn't even involve the stove or oven at all!! All you need is your handy dandy microwave. ;-) This is a recipe for a deeeelicious dip made with butternut squash. I made this for the first time for our New Year's Eve gathering and have been meaning to share it with you ever since then! I fell in love with this dip immediately. Why? Well, there are a few reasons...  First of all, it's YUMMY. It's so yummy that it's addicting. Seriously. Secondly, it's EASY. So easy. Thirdly, it's fairly healthy! Well, it's healthy in the sense that it contains the nutrient-laden veggie of butternut squash. Two of the other ingredients, parmesan cheese and sour cream, may not be so healthy themselves...but if you enjoy this in moderation, you're still going to gain the benefits of the squash but not too many calories!

As I said, this recipe is simple. It involves:

Microwaving frozen butternut squash.


Mixing that with sour cream, parmesan cheese, and salt and pepper to taste.


EATING.

That's it!

Oh, and here's the actual recipe I followed so you know the measurements when you're making this yourself. :) I know you're going to!!

Here are a couple pics of the dip and several other goodies we had for NYE (over a month ago now!).


I have had this dip cold, at room temp, and warm. It's delicious any way, I promise you! I still can't decide which is my favorite. I've served this with crackers and veggies so far. I haven't served it with bread yet, so I'll have to do that next time (maybe a sliced, toasted baguette would be yummy?!). As I said above, it's addicting. Watch out!!


Mmmmmmm.

I'm off to sunny California first thing tomorrow morning to run a half marathon this weekend! It'll probably be a week or so until I can blog again, but I look forward to bringing you another tasty Barbershop treat soon. As usual, I have several waiting on deck!

Oh, one more thing...  I'd love your opinion on my new blog layout and design! I thought I'd change it up a bit. It's still not definite that I'll keep this, but I'd love your thoughts to help me make my decision. Thanks!! :)