Thursday, September 30, 2010

Butternut Squash Apple Soup


Hello!!! My favorite month, October, arrives tomorrow. :) In honor of this wonderful month, I thought I'd post a very appropriate autumn recipe...butternut squash apple soup! This recipe is definitely a keeper!

I'll skip the chatting and just get right to the recipe. It's from Health magazine, and you can read it here! I love that it's low-cal and good for you. :)

Here are some pictures of the process.


The chopped squash and apple, ready for the stove.


The mini chopper was super helpful for finely chopping the onion!


Simmering away...


Next, everything goes in the blender to puree the veggies! You also add evaporated milk at this stage to thicken the soup a bit.

And here you go - deeelicious butternut squash apple soup! Piece of cake! It truly is a very simple and incredibly tasty recipe.


A tip I learned about cutting butternut squash after I made this (I'll know for next time now!). Apparently it's much easier to work with if you microwave the squash first for a few minutes (pierce it with a knife in several places before microwaving). Then you can peel and chop it much more easily. This type of squash is a tricky bugger, so this is a great tip!

I made homemade apple cider donuts tonight, also in honor of October beginning tomorrow. They are soooo darn good. Stay tuned for that recipe! See you again soon, hopefully. ;-)

Tuesday, September 28, 2010

Créme de Menthe Bars


Hi Barbershop fans! I've been quite busy with many wonderful events with family and friends lately, so I've been slacking with the blog...my apologies! And speaking of wonderful events, I made these creme de menthe bars for my boyfriend Mike's parents' 40th wedding anniversary party a week or so ago. They were a hit! I wanted to make something a little more special than a typical brownie for the occasion, and I thought the combination of chocolate and mint in these bars would be just right for the event. :)

I love the look of these bars! Fortunately, it doesn't really take much effort to make them look so pretty. ;-) The creme de menthe liqueur is really the key to making them look good. The liqueur does "all the work" by making the middle layer a very pretty green color.


Now, onto the recipe...

The bottom brownie layer recipe can be found here. And just so you know, this basic brownie recipe is my favorite from scratch brownie recipe...just sayin'...it makes some tasty brownies!


When I made the brownies I also added some chopped thin mints for an extra mint taste. Mmmmmm. LOVE chocolate and mint!


After you've baked the brownies, let them cool as you work on the middle layer...the pretty green layer!
Here is the mint layer recipe:

-2 cups powdered sugar, sifted
-4 Tbsp. butter, softened
-1 Tbsp. milk
-5 Tbsp. creme de menthe (approximately)

-Combine all the ingredients and beat with an electric mixer until light and fluffy. You may want to taste as you go and add more creme de menthe, if needed... It's important for quality control to taste test along the way, you know. :)


Make sure that the brownies are cooled completely before spreading the mint layer on top of them. Once the mint layer is evenly spread, I'd recommend putting the pan in the fridge to let it cool even more while you prepare the final layer. For the final layer, microwave about 1 cup of semi-sweet chocolate chips (or dark chocolate, if you prefer) and 6 Tbsp. real butter at 30-second intervals until the mixture is smooth and the chips are completely melted. Set the mixture aside for a few minutes to let it cool before spreading it. When you're ready to go ahead and spread the chocolate layer though, move quickly. Put the bars back in the fridge to completely cool one more time and then voila, you're done!


Well, you're done if you want to be... You could also do one more step and add some Andes mints to the top of the bars to make them look even more festive. I cut each Andes mint into quarters, as you can see below, and placed one on each bar. Unfortunately, I didn't think about doing this until the top chocolate layer of the brownies was completely cool...so I had to "force" the mints to stay on each bar. But it still worked! Next time I think I'd put the Andes mints on top before the chocolate cools and hardens.


These were a big hit at Mike's parents' anniversary party! I also brought some into my coworkers, who gobbled them down as well. Deeelish. I WILL make these again, you can be sure of that! You should try them too!


Talk to you again soon. I have a few fall-themed recipes for you!!!!!! LOVE the fall.

Thursday, September 16, 2010

Whole Wheat Banana Muffins


 I have another fall-ish recipe for you!  Whole wheat banana muffins...  Actually, to be fair, I don't always consider banana to just be a fall flavor, but as I made these muffins, the delicious cinnamon aroma that accompanied them while baking did make me associate them with fall...and that cinnamon aroma continued to stay with the muffins a few days afterward too.  Perfect. :)

This recipe is from a favorite blog of mine, Our Best Bites.  I've shared a couple frosting recipes with you from this blog (which have become go-to frosting recipes too! one is vanilla and one is chocolate).  Judging by the thousands of followers Our Best Bites has and by the success I've had with their recipes in the past, I thought this muffin recipe might be a winner too...and I was right!  These were very flavorful, moist, hearty, and just plain yummy.  You can find the recipe for the whole wheat banana muffins here.


I used some fun autumn muffin/cupcake liners!  Love these.


Here are some mini muffins, fresh out of the oven! Who can resist a yummy mini muffin?! I can't...

This was a very simple recipe overall.  No fancy ingredients or techniques necessary!  The original recipe actually calls for adding pecans too, but I don't always add nuts to recipes, and I chose not to with this one.  I guess I just wasn't craving a crunchy muffin!

These muffins really helped me to get in the mood for fall, my favorite season.  I just love it!  I know that in my last post I said I was going to try my hand at homemade cider donuts.  I haven't forgotten, don't you worry!  At some point this fall I'll be making them; I'm just not sure when quite yet. ;-)

I need your opinion...  Flash or no flash with these photos below?  Which do you prefer?  I think I know what I like, but I'd like your opinion too...please and thanks. :)


Talk to you again soon!

Monday, September 13, 2010

Yum Yam Smoothie ;-)


Yum Yam Smoothie! I know, it's a bit of a silly name, but the words I've used to describe this smoothie are very appropriate! I almost called it Yummy Yammy Smoothie, which would have been even sillier, wouldn't you agree? :)

My lovely friend Jenn and I had a fun "fall fest" this past weekend where we just soaked up all the amazing sights, sounds, and tastes that come with fall! We began the day with these delicious "yam" (or, sweet potato!) smoothies for which I'm about to share the recipe... Originally, we had intended to make pumpkin smoothies, but neither the store Jenn went to, nor the store I went to, had canned pumpkin! That is tragic, really. :-( I went to a different store today, and they were out too... I don't know what I'll do if I can't find canned pumpkin this fall!

But anyway, back to the delicious smoothie that we did end up making. The lack of pumpkin was actually serendipitous; if we hadn't tried this smoothie with the yams, we would have never known how yummy they can be too!

This recipe served the two of us (in big, tall glasses pictured below!):

-2 cups almond milk
-1 and 1/2 frozen bananas
-1 can (15 oz.) cut yams, drained
-3 to 4 Tbsp. (approx.) of the syrup from the canned yams
-dash of vanilla extract
-dash of cinnamon
-dash of nutmeg
-handful of ice

Blend all of the ingredients, and voila, you have yourself a tasty fall-flavored smoothie! 


This truly was amazing. I am a bit of a big dork when it comes to the fall and how excited I get about it, but really, this was so delicious. I love the light orange color. It almost fools you because it looks like a creamsicle! We put another dash of cinnamon and nutmeg on top of the smoothie before sipping too. It was so refreshing and obviously incredibly healthy too, thanks to the almond milk, sweet potatoes, and bananas! Did you know that cinnamon has some great health benefits too? Check them out here. I actually put a dash of cinnamon in my coffee each morning, which is also quite delicious...just fyi. :)

We also went to a huuuge apple orchard, Russell Orchards, about 45 minutes outside of Boston in Ipswich, MA. It was great! It was definitely the biggest orchard to which I've ever been. They also have a winery, but sadly, Jenn and I were not impressed with the wines we tasted. BUT, they had the best cider donuts I've ever had. No joke! They were absolutely delicious...they were soft, doughy, and had just the right amount of cider flavor. They weren't covered in cinnamon sugar either; they were perfect as is! See?


My next mission is going to be to make my own cider donuts at home... So stay tuned for that! I also have a few other recipes I've made in recent weeks that are just waiting on deck to share with you.

Happy almost autumn, all!

Saturday, September 11, 2010

No-Bake Chocolate Peanut Butter Oatmeal Cookies


Hi there! It's time for the Barbershop to share a quick and easy recipe that doesn't even involve baking! One of my favorite blogs is Brown Eyed Baker, and one of the most popular recipes on that site is the recipe I'm about to share for no-bake chocolate, peanut butter, and oatmeal cookies. These are sooo easy, it's not even funny. Start to finish (and by finish, I mean, these cookies were ready to eat!) was about 30 to 35 minutes. And that even involved the extra time I took to snap a few pictures along the way. ;-)

You can find the recipe here. It involves just seven simple ingredients (ones that you likely have on hand already too; I love that!). A few pictures are below for your enjoyment.

Cookie sheets, ready with the wax paper!


Beginning to cook ingredients on the stove...


Here's the final mix. Yummm.

The next step is placing "dollops" on the wax paper and then letting them cool and harden. Once I placed them on the wax paper, they were ready in about 15 - 20 minutes or so. And you could even put them in the fridge or freezer to speed up that process!


This made almost three dozen cookies for me.


I was trying to get a good shot of the cookies stacked up on a plate... I never know if a flash or no flash is better with food pictures (you may have noticed that I often include pictures with and without a flash in my blog posts). So you'll have to bear with me with my amateur photography skills! I actually thought this picture below looked cool though, with the shadow of the cookies in the background there.


So the next time you need a fast and delicious treat, I encourage you to try these no-bake cookies! They are very yummy, and I guarantee that if you share them with others, they'll be gobbled up in no time. That was the case with my coworkers. :)

See you!

Tuesday, September 7, 2010

A Tribute to a Tradition: Homemade Pie!!


I have a confession to make. I have never made a homemade pie. Well, that is, until this past weekend, I had never made a homemade pie. Can you believe it??! Many people who know I love to bake find it pretty hard to believe when I tell them (or used to tell them!) I have never made a pie. I figured it was about time to put an end to that! And especially when I have a wonderful mother and grandmother who are amazing pie makers, it's about time I stepped up to the plate too!

You're in for a treat with this post... I'm going to share not one, but two pie crust recipes that my grandmother uses. Consider yourself pretty lucky! ;-)

The first crust recipe is the one I used for the very first pie I made this past Labor Day weekend (pictured above). It is taken verbatim from an email my grandmother sent me with the recipe. :)

-2 cups flour
-1 tsp. salt
-2/3 cups Crisco plus 1 T.
-1/2 cup cold water

Mix together flour and salt. Add Crisco. Mix with fork until crumbly. Add water and mix until it holds together. Chill for 15 minutes or more.

Mom's tip: Mixture will be just right when the dough forms into a ball and clears the bowl.

My hint: I put ice cubes in water and then measure l/2 cup water from that. More water may be added but too much water will make a tough crust.

Please note that this recipe is for one 9-inch crust. So you'll have to double the recipe for a double crust!

And here is recipe #2 from my grandmother, again taken verbatim from her email. :)

-4 cups flour
-1 and l/2 cups Crisco
-l Tbsp. sugar
-l Tbsp. vinegar
-l egg
-2 tsp. salt
-l/2 cup cold water

With fork mix together first four ingredients. In separate dish beat remaining ingredients. Combine the two mixtures until all ingredients are moistened. With hands, mold dough into ball and place in the fridge at least 15 minutes before rolling out. Makes a  9" double crust pie. This is a no-fail pie crust and easier to mold than the first recipe.

There you have a couple "famous" recipes! My grandma's pies are always amazing, so if you try one of these two recipes, I am sure you will be pleased!

Now, my all time favorite pie is, by far, strawberry rhubarb. Mmmmm, SO delicious. I was lucky enough to receive one of my favorite pies from my grandmother for my birthday this summer too! Below are a few pictures of it. I wish these pictures could magically turn into the real thing!! Honestly, this pie is just the best pie ever (especially when made by my mom or grandma!).


I asked my grandma about her strawberry rhubarb recipe, and she says she just follows the recipe on the Tapioca box! Who knew?! I certainly didn't. I bought some Tapioca this past weekend with the intention of making a strawberry rhubarb pie as my first ever pie. However, the store didn't have any rhubarb :-( so I had to improvise. I had some frozen blueberries (hand picked fresh by my mom earlier this summer!), so I decided to use those in my pie. I only had three cups of them though, so I supplemented with one cup of strawberries (four cups of fruit total is what's recommended on the back of the Tapioca box). In fact, I took a picture of the back of the box so you can see what ingredients and proportions are recommended for apple pie, blueberry pie, and strawberry rhubarb. Basically, I am feeling too lazy to write it out for you, so the picture of the recipes on the box is what you get! :)


As I mentioned earlier, for my "berry" pie, I used three cups of blueberries and one cup of strawberries. I added about 3/4 cup of sugar, I'd say, 1/4 cup tapioca, one teaspoon or so of lemon zest, as well as a couple teaspoons of lemon juice. That's it! Oh, and I also put a few very small dollops of butter atop the fruit mixture before baking. I followed the temperature and time instructions listed on the box.

Here are a few more pictures of the Barbershop's inaugural pie during its creation. :) I used the first crust recipe listed above, by the way!


There she is, the finished product!

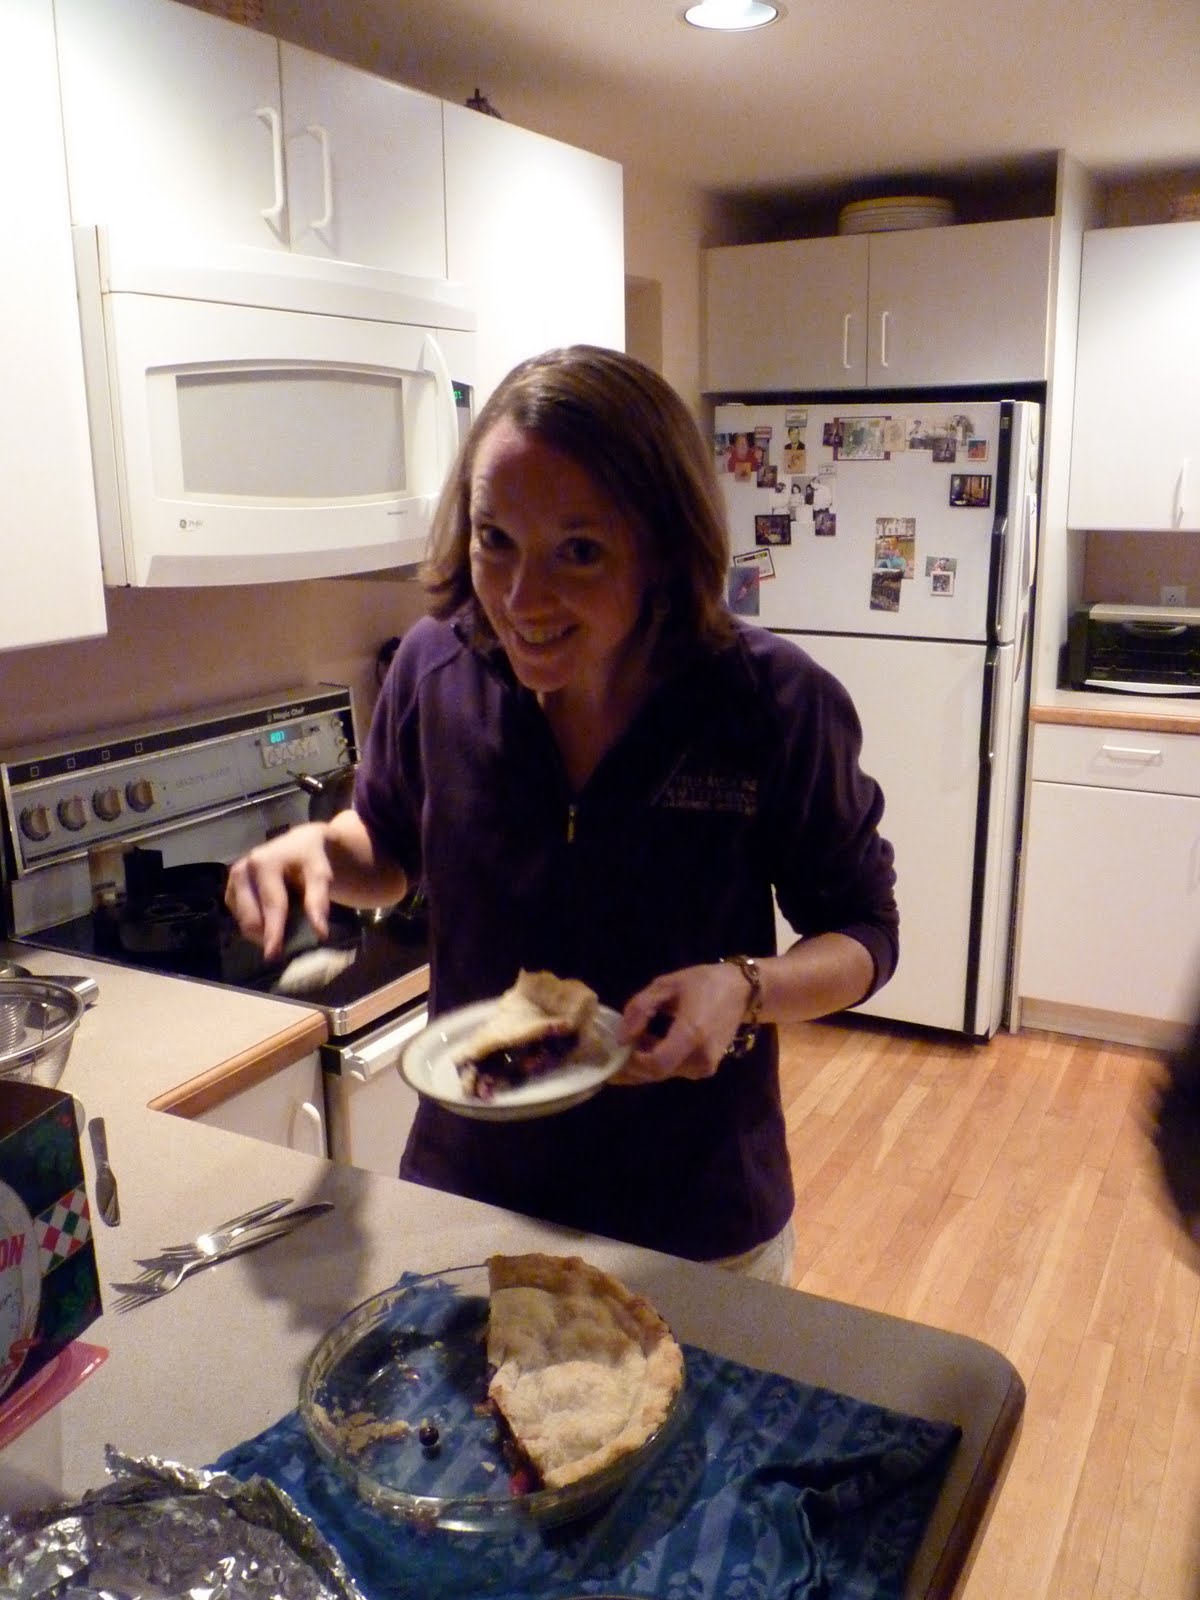
And here I am serving it (not sure about that weird look on my face or why I'm hunched over like that!).

Mike's family were my guinea pigs, as I shared the berry pie with them when we visited them this past weekend for dinner. Unless they were just humoring me (which I don't think they were ;-)), they really liked it! I am definitely encouraged by my first pie making experience and plan to make many more! It wasn't really difficult at all. It was a bit more time consuming than other types of baked goods I often make, but I didn't find it too challenging (for some reason I think there's a myth about pies being hard to make??!).

Also, one more fun tip for you...  Whenever my mom used to make a pie, she'd make these delicious cinnamon sugar pie dough "strips" with the extra dough. Well, I thought they were cinnamon sugar strips, but apparently they were sprinkled with nutmeg, not cinnamon!  So, you can probably use whichever spice (or both) that you'd like. Anyway, I decided to use the extra dough I had from my berry pie to do this. All I did was roll out the dough, cut it into strips (or whatever shapes you'd like!), brushed them with melted butter, and then sprinkled with a cinnamon sugar mixture. Such a fun treat!

 Here is the raw dough with butter and cinnamon sugar, before popping them into the oven. I actually also just learned that my mom didn't brush them with butter either - another inaccurate memory of mine. Oops! You can make them however you please. ;-)

And here there are, fresh out of the oven and ready to be devoured! This is such a great memory of mine from when I was little. I loved when Mom made these for us!!

Well, that's all from the Barbershop this time. Looking forward to sharing more recipes with you soon!