Monday, December 30, 2013

2013: Year in Review

I thought it would be fun to do a brief Year in Review of What's Baking in the Barbershop?! for 2013. Many other blogs I follow have done this, and I always enjoy reading their year-end recaps. Sometimes bloggers share their most popular posts with readers, their own personal favorites, and various highlights from their own personal lives. I thought I'd follow suit and share a few in each of these categories!

First, a brief recap of the posts that were most popular with my readers this past year...


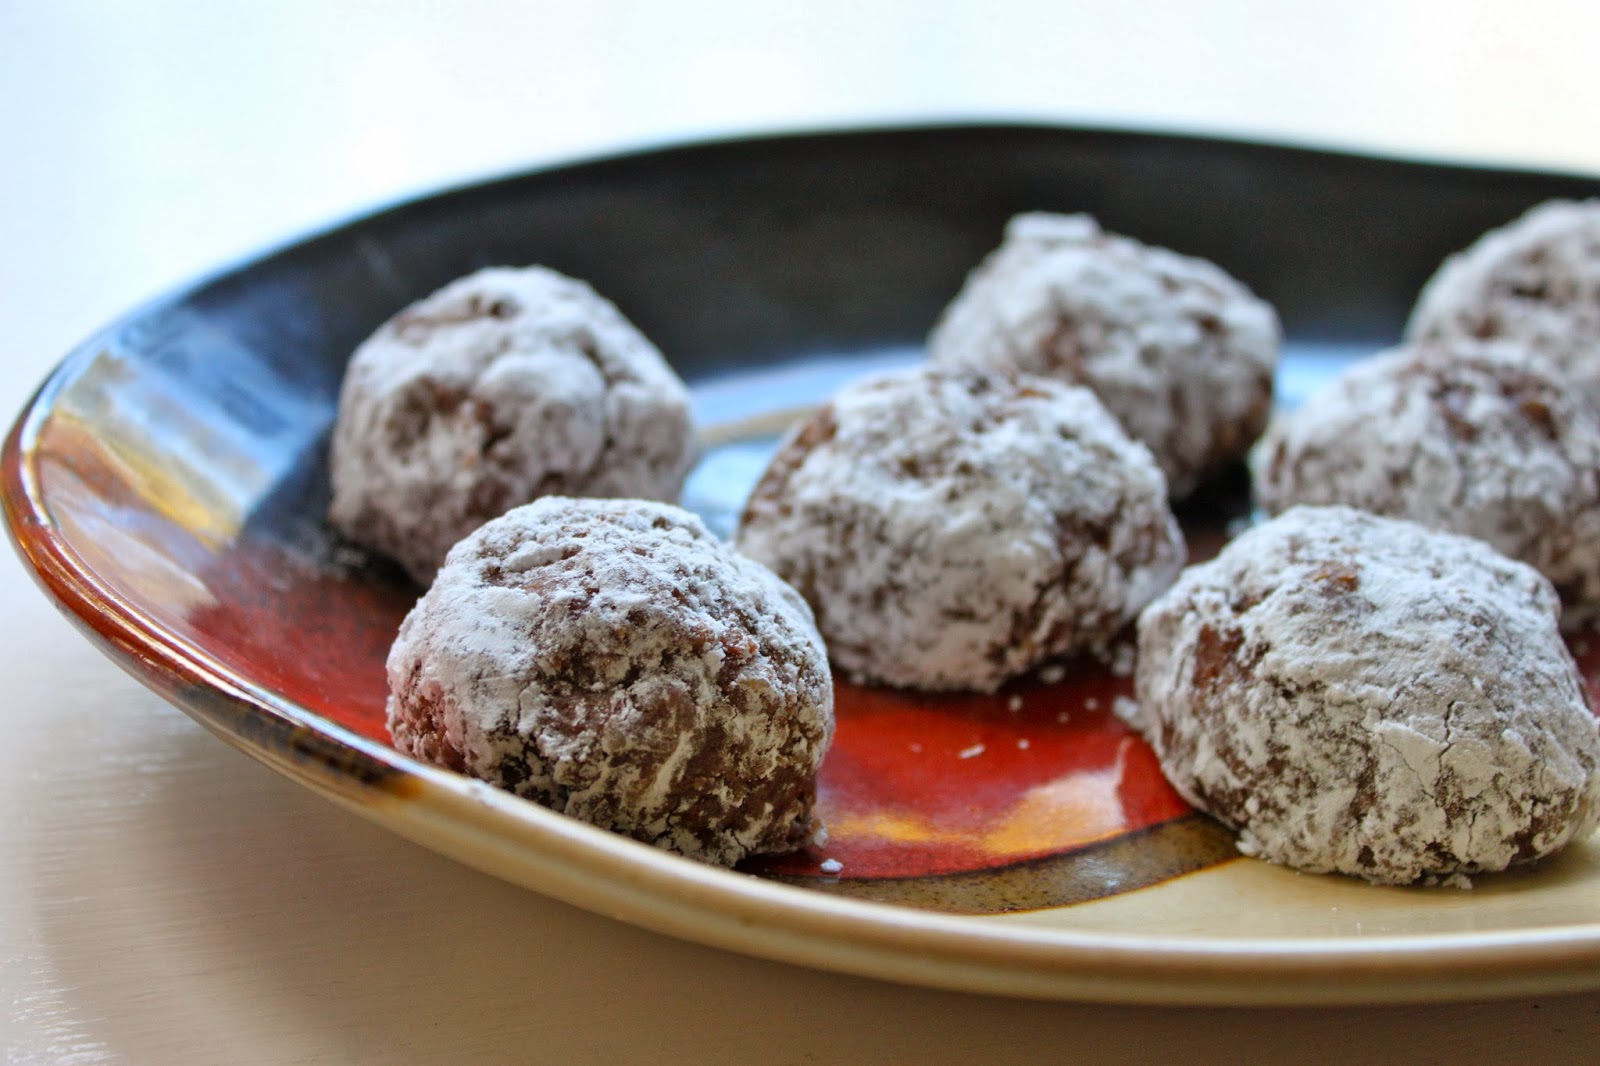
The post for these cookies ended up surpassing my chocolate chip graham cracker blondies as my most viewed post of all time!


My own personal favorite recipes that I posted in 2013?

Well, a few are the same as what my readers liked! I was a huuuuge fan (and still am) of the chocolate almonds date balls and the peanut butter oat granola bars. And my other favs... 


And a couple other highlights from my year...

Going on a most amazing honeymoon to France and Belgium this summer with my husband! If you missed some of the pictures I shared, you can check out this post.


Celebrating our one year wedding anniversary in November. :)


We celebrated with a wonderful meal at Ten Tables in Jamaica Plain.

And finally, we sold our condo! That was definitely a big highlight. Although we are sad to leave the city, we are ready for a house in the 'burbs with more space. We are still house hunting (the Boston market right now is ridiculously tough for buying!), and thankfully, we are lucky enough to be staying with my in-laws in the meantime while we house hunt... We're really hoping that 2014 is our year to find our new home! :)

I also wanted to share a big thank you to my readers who continue to read my blog; you are very much appreciated! The blog "audience"is what keeps me going. Although I may not post as frequently as I used to, I still really love trying new recipes and sharing them with you in this little space. Thank you for being there for me!

And I wish everyone - all of you - the best year yet in 2014. :)


Monday, December 16, 2013

Chocolate Espresso Crinkle Cookies


The countdown is on! Fewer than 10 days until Christmas. Have you done your fair share of holiday baking already, or have you yet to start?! I have done some here and there, but I plan to do more. Thankfully, I've already made these awesome cookies with enough time to spare before Christmas to share them with you! If you're still looking for more Christmas cookie recipes to try, then stop looking. I've found one for you. ;) These chocolate espresso crinkle cookies are amazing.

The fabulous recipe is from Heather Christo.

Ingredients:

-1/2 cup unsalted butter, softened
-1 and 1/2 cups sugar
-2 eggs
-3 Tbsp. espresso, cooled
-2 cups all-purpose flour
-1 cup unsweetened cocoa powder
-2 tsp. baking powder
-1 tsp. salt
-1 to 2 cups powdered sugar (for rolling)

Instructions:

Preheat oven to 350 degrees. Line cookie sheets with a silpat or parchment paper. With an electric mixer, cream together the butter and sugar. Add the eggs, one at a time, followed by the espresso. Mix everything together until well combined. In a separate bowl, combine the flour, cocoa powder, baking powder, and salt; add dry ingredients to the wet. Scoop dough by the tablespoonful, roll into balls, and then coat by rolling in powdered sugar. Place on cookie sheets, and bake for 8 to 10 minutes or until cookies "crack" and are set. Let cool for a couple minutes before removing to cool completely on cooling rack. Store in airtight container. Makes about 30 cookies.


 I baked these the day after we got our first snowstorm of the season. It was a perfect way to spend a snowy afternoon!


We love these cookies. If you know someone who loves coffee and chocolate, definitely make these for them! They are soft, chewy, and full of flavor. And the espresso definitely kicks up the chocolateyness (yes, that's a word) a notch.

Also, a few notes about the recipe and method... I did use espresso, although my guess is you could try making these with regular coffee - just brew it strong! Also, I refrigerated my dough, only for 10 - 15 minutes or so, before rolling it into balls. It made it slightly easier to work with. That being said, it wasn't a very difficult dough to work with in the first place! So chilling is definitely not necessary (the original recipe does not instruct to chill the dough). And finally, I only needed about 1 cup of powdered sugar for rolling although the original recipe calls for 2 cups. So, I recommend starting out with just 1 cup so you don't "dirty" more powdered sugar than you have to. And finally, my cookies took closer to 11 or 12 minutes to bake, instead of 8 to 10 - so just keep an eye on yours. As we all know, baking times will vary with each oven!


Santa was eyeing these cookies... I think he'd like some left out for him on Christmas Eve. ;)


These are a perfect Christmas cookie, in my opinion! I hope you get the chance to make them this season. :)

Btw, apparently I'm into sharing recipes lately that involve rolling things in powdered sugar! In case you missed it, these rum balls I recently posted about would also make an excellent Christmas treat this season.


Monday, December 9, 2013

Rum Balls (No Bake)

Rum balls = holiday time. Wouldn't you agree? :)


Last year I made some deeelicious Bailey's balls, and boy, were they good! I think I made them three different times for various holiday-themed occasions, and they were a big hit every time. For the first holiday party that we attended this past weekend, I wanted to bring the Bailey's balls...but the blogger in me also wanted to try something new! I know all you other bloggers know what I mean... So, I made some Bailey's balls and I tried a new recipe for rum balls. Thankfully, they turned out quite well also!

And these rum balls couldn't be any easier, just like the Bailey's balls. They come together in 15 minutes flat. Perfect for when you're rushing around at the last minute, getting ready for that holiday party this coming weekend but don't yet have a treat to bring. ;)

The recipe is adapted from this recipe from Taste of Home.

Ingredients:

-2 and 1/2 cups graham cracker crumbs (or vanilla wafer crumbs)
-1 cup ground pecans (or walnuts)
-1 cup confectioners' sugar
-2 Tbsp. plus 2 tsp. unsweetened cocoa powder
-1/4 cup rum
-3 Tbsp. honey (or maple syrup)
-2 Tbsp. water
-additional graham cracker crumbs, ground pecans, or confectioners' sugar

Instructions:

In a large bowl, combine the graham cracker crumbs, ground pecans, confectioners' sugar, and cocoa. In a small bowl, combine the rum, honey (or maple syrup), and water. Stir the wet ingredients into the dry ingredients until well incorporated. Shape into 1-inch balls. Roll into the additional graham cracker crumbs, pecans, or confectioners' sugar to "garnish." Store in airtight container in fridge for a couple weeks. Makes about 2 dozen balls.


A few points to note...

The original recipe actually called for crumbs of vanilla wafers, not graham crackers. But graham crackers are what I had on hand, so that's what I used. I'm sure vanilla wafers would work just as well. Also, I used a combination of ground pecans and walnuts, as I didn't have enough pecans on hand. Again, this worked just fine! I love recipes like this where it's easy to improvise. And finally, the original recipe called for honey, but I tried maple syrup instead. Easy and delicious! So, keep in mind when you make these that you have some options. ;) For the rum, I used Captain Morgan's, as you can see in the photos.


You can definitely taste the rum in these! It wasn't too much though. It was juuuust right. They're just slightly chocolatey and sweet, and then that rum flavor comes through as well. And they're fun to eat besides! I also think the flavor of these is even more enhanced a day or two after you make them. So, if you have the time to make them ahead, definitely do that!


In need of other ideas of sweet treats to make this holiday season? Maybe to give to friends or coworkers? Or to bring as a host/hostess gift to a holiday party? Then check out these other recipes that have previously been on the blog. They're all fairly simple - perfect for this time of year when you might not have much extra time to spend in the kitchen!

Chocolate Covered Sea Salt Caramels


Cinnamon Sugar Almonds


Hershey Kiss Pretzel Bites


Easy Peanut Butter Fudge

Chocolate Graham Toffee Treats

Cranberry White Chocolate Cinnamon Chip Bars

Sunday, December 1, 2013

Cranberry, Oatmeal, Cinnamon Chip Cookies


The holiday season is here! Hard to believe, but it's true. And with the holiday season comes cookies. Of course. :)

Whether it's for a family gathering, a work party, or a cookie swap with friends, this time of year there always seems to be a reason to eat cookies.

And to me, any reason to eat a cookie is a good reason. ;)


These cranberry, oatmeal, cinnamon chip cookies are just a simple variation on another couple cookie recipes I've shared on the blog before. This recipe involves the same base cookie dough recipe as my pecan, cranberry, cinnamon chip cookies and these oatmeal, butterscotch, chocolate chip cookies. The main thing I changed this time around was just the add-ins. It's almost too simple to share on the blog, but we enjoyed this ingredient combination so much that I decided it was blog worthy!


Ingredients:

-6 oz. (1 and 1/2 sticks) unsalted butter
-1 cup packed light brown sugar
-1/2 cup sugar
-2 eggs
-2 tsp. vanilla extract
-1 cup all-purpose flour
-1 cup white whole wheat flour
-1/2 tsp. salt
-1/2 tsp. baking soda
-1 tsp. cinnamon
-3/4 to 1 cup regular oats
-3/4 cup dried cranberries
-3/4 cup cinnamon chips

Instructions:

Preheat oven to 350 degrees. Melt butter, and let cool slightly. Combine the two sugars in a large mixing bowl with a whisk, and once the butter is cooled slightly, whisk in the butter with the sugars. Whisk in the eggs and vanilla. In a medium bowl, combine the flours, salt, baking soda, and cinnamon. Add the dry ingredients to the wet ingredients, and mix until just combined. Stir in the oats, cranberries, and cinnamon chips.

Line baking sheets with parchment paper, and drop cookie dough by the tablespoonful on baking sheet. Bake for 10 to 12 minutes or until outside edges of cookies are lightly browned. Remove from oven and let cool for a couple minutes before removing to cooling rack to cool completely. Once completely cooled, store cookies in an airtight container. Makes approximately 2 dozen cookies.


What I love about these cookies (and the other cookies made with the same base dough recipe) is 1) how simple they are (you don't even need a mixer), 2) how full of flavor they are, and 3) how soft and chewy they are. There is just a very, very slight crisp to the outside edges of these cookies, but the overall texture of these is definitely chewy. It's my favorite kind of cookie!


I think these would make a great addition to your holiday cookie swap or dessert table over the holidays. The cranberries and cinnamon are such perfect flavors for this time of year.


Happy December! I hope everyone had a fabulous Thanksgiving filled with family, friends, and delicious food. Thanksgiving is my favorite for those reasons. :)

Friday, November 15, 2013

Is It Really Mid-November Already?! :)

 I can't believe it's mid-November! Can you? As you can probably tell from my lack of blog posts lately (my last one was 10 days ago!), life has been pretty busy. The hubs and I are moving soon, and as everyone knows, moving is stressful! And it's time consuming. I just haven't had the time, nor the energy, to focus on blogging. Hopefully after the move and we're feeling more settled, I'll be back to baking and blogging!

In the meantime, I thought I'd just share a fun blog post with you...a little of this and a little of that!

First thing? Mike and I celebrated our one year anniversary on November 3rd! I can't believe it. That year flew by. :)


We celebrated by going out for a nice dinner at one of our favorite local restaurants in Jamaica Plain, Ten Tables (I've actually blogged about it before). It was amaaaazing. We rated it in our top three meals ever! Now that's pretty good.


Needless to say, after we ate all the food pictured here, we were pretty full! :)

What else, let's see...

Tea! Now that it's gotten much colder, I've been having tea at least once or twice a day.


One of my favorite kinds is Yogi's Kava Stress Relief. I love that each tea bag has a quote on it too. This one was one of my recent favorites: "Mental happiness is total relaxation." It's a delicious tea too, flavored with cinnamon, sarsaparilla, ginger, and cardamom. I highly recommend it!

During the month of October, Mike and I joined the October Unprocessed pledge with Eating Rules, where with thousands of other people, we pledged to eat as many unprocessed (and as few processed) foods as we could. It was a great challenge! We really enjoyed the experience. I plan to write a blog post about it at some point...

Lastly...eggs! Mike and I cook eggs all the time, and we've recently made a couple delicious egg recipes, one of which was eggs poached in tomato sauce. Oh. My. Goodness. So good! And so easy too. We enjoyed this as an easy weeknight meal. I followed this recipe in case you want to try it yourself! And we added some crumbled feta on top. Because feta makes everything bettah!


I hope you don't mind the randomness of this post, but I thought it would be fun to share with you some bits of life outside the blog!

Oh, and TGIF ;)

Tuesday, November 5, 2013

Spicy Pumpkin Hummus


Pumpkin season is here and has been for a while. Personally, I wish it was here all year round. And I know people say that we wouldn't appreciate it as much if it was here year round, but I don't know... I still think I would love pumpkin just as much and be just as excited to make recipes with it! But that's just me. :)

I'm excited to share with you a pumpkin recipe that's not a baked goodie for a change! I think that this delicious pumpkin hummus could be a great addition to your Thanksgiving appetizer spread.

The recipe came from Hollie's Hobbies blog.

Ingredients:

-1 can (15 oz.) chick peas
-1 can (15 oz.) pure pumpkin
-4 garlic cloves
-2 tsp. chili powder
-1/2 tsp. cumin
-1/2 tsp. ground ginger
-1 tsp. cinnamon
-1 tsp. salt
-3 to 4 Tbsp. olive oil
-2 Tbsp. honey
-1/4 cup beer (I used Sam Adams Harvest Pumpkin Ale)
-2 Tbsp. lemon juice
-1 Tbsp. pepitas (optional)

Instructions:

Combine all ingredients, except pepitas, in a food processor. Process until the hummus is smooth. Taste it, and if needed, add more spices (of your choice) and olive oil. Put hummus into a serving dish, top with a tablespoon or two of olive oil and pepitas. Serve with veggies, pita chips, etc.


As you can tell from the photos, I didn't add the pepitas, as I didn't happen to have them on hand. Otherwise, I had all the ingredients on hand so this was a breeze to make - no need to go to the store for anything special!

And although I used a pumpkin beer, I bet many different styles of beer would work well with this, so feel free to use your favorite. Or, if you'd rather, you can omit the beer; just add a little more olive oil.


This hummus definitely has a kick to it! I am not a huge fan of spicy foods, and for me, the spice amount was just right. It had a kick, but it wasn't too strong. Definitely taste as you go. If you don't care for spicy foods, you may want to add less of the chili powder to start. And if you love spice, go ahead and add more!

In addition to being a great dip for veggies or pita chips, this hummus would be an awesome spread on a sandwich too!


It was so easy to put together. In less than 10 minutes, you have a delicious, healthy appetizer. As I said earlier, this would be a fantastic addition to your Thanksgiving appetizer spread this year!


Wednesday, October 23, 2013

Cinnamon Chip Scones


I told you earlier this week that I'd have another recipe this week that involved cinnamon chips. :)

And here it is! Cinnamon chip scones. Gosh, I loved these scones. They were sooo good! Flakey, buttery, and full of cinnamon flavor. What's not to love?

This recipe is from Buttercream Fanatic, another blog that I've recently become a big fan of. The recipe is actually a "copy cat" recipe of the Starbucks cinnamon scones. Do you know those? They're quite good, I must say. I haven't had one in a while but I remember liking them when I tried them years ago. Well, I have good news for you. This recipe is 10 times better! Maybe even more than 10 times...


The only thing I changed with this recipe was that I decided not to add the glaze. I could tell that these scones were going to be awesome on their own, so I decided to forgo the glaze. And the recipe was still a great success without it. That being said, I'm sure they are excellent with it too. So, it's up to you whether you want to add the glaze. I've included the ingredients and instructions below in case you want to add it. What I did do though, was add maple sugar on top of the scones before baking them. If you can't find maple sugar (King Arthur Flour sells it), I bet cinnamon sugar would be excellent as well.

Ingredients:

For the scones:
-1 and 1/2 cups all-purpose flour (plus more for the cutting board)
-1/2 cup whole wheat flour
-1/4 cup granulated sugar
-1 tsp. baking powder
-1/2 tsp. baking soda
-1/4 tsp. cream of tartar
-1/2 tsp. salt
-1 tsp. cinnamon
-1/2 cup cold, unsalted butter (cut into 1/2" cubes)
-1/2 cup plain Greek yogurt
-1 egg
-1/2 cup cinnamon chips
-1 Tbsp. maple sugar (optional)

For the glaze:

-1/2 cup powdered sugar
-1/2 tsp. cinnamon
-1 and 1/2 tsp. milk

Instructions:

Preheat oven to 350 degrees. Place parchment paper or a silpat on a baking sheet, or spray it with cooking spray; set aside. In a large bowl, whisk together the dry ingredients (flours, sugar, baking powder, baking soda, cream of tartar, salt, and cinnamon). Cut in the butter, using a pastry cutter, two knives, or a fork until the butter is in pea-sized pieces.

In a separate bowl, whisk together the yogurt and egg. Add to the dry mixtures and mix until just combined. Add cinnamon chips. Sprinkle flour on a cutting board, and turn dough onto the board. Knead a few times to bring the dough together, and shape into a ball. Gently press down to form the dough into a disc, approximately 8 or 9 inches in diameter. If using, sprinkle the maple sugar on the scones at this point, pressing down gently to help it stick to the dough. Use a sharp knife to cut it into eight triangles.

Transfer scones to prepared baking sheet, spacing them about 2 inches apart. Bake for 15 minutes or until they are lightly golden brown. Remove from oven and transfer to cooling rack to cool completely. If making the glaze, while the scones cool, whisk together the powdered sugar, cinnamon, and milk in a small bowl. Drizzle over completely cool scones. If glazed, store scones in fridge. If un-glazed, store in airtight container at room temperature.


Here you can see the maple sugar that I sprinkled on top of the scones before baking...


I absolutely loved how flakey these scones were. But, importantly, they weren't dry. They were delightfully buttery. In my opinion, they were the perfect scone texture.


And of course, one of my favorite aspects of these scones was simply the cinnamon chips themselves! Can't. Get. Enough.


This weekend? Make these scones. You must.


And then report back to me on how much you love them. Mmmm, k? :)