Sunday, March 13, 2011

Quinoa with White Beans & Veggies


Welcome back! Happy "spring ahead" day. :) I look forward to using the extra hour of daylight to go for a run later... It's definitely starting to feel like spring in Boston with temps in the high 40's and low 50's. I wonder if we'll get one more winter storm though?! I wouldn't be surprised!!

Alrightie, enough small talk and onto food talk. I have a super easy and delicious dinner recipe for you today....not a usual baked dessert or breakfast treat! One evening last week I didn't have a lot of time in the kitchen, but I was craving veggies - cooked veggies, not raw. A delicious green salad with a variety of veggies is a common go-to easy dinner for me, but I just wasn't in the mood for a typical salad. So instead, I made a quinoa salad! I have come to really love and appreciate quinoa. You may remember that I've written about it once before when I made Butternut Squash Black Bean Quinoa Salad last fall. Quinoa is incredibly tasty and healthy. If you haven't had it before, I encourage you to buy some the next time you're at the grocery store! I think you'll be glad you did.

The recipe I'm going to share with you isn't earth-shattering. It's not the most creative recipe in the world, but it is yummy, I promise! Here's what I did:


First, I sauteed onions, red peppers, and mushrooms in extra virgin olive oil on the stove over medium heat. I added the mushrooms only for the last few minutes of the cooking; they took much less time to cook than the onions and peppers. I kept the seasonings basic with these veggies - just used garlic and rosemary!


I had roasted sweet potatoes earlier in the week, and I had some leftover. Perfect to add to this dish! I warmed them up on the stove when the rest of the veggies were cooking.


I used white quinoa, but you could easily use red too.


For the quinoa, I cooked one cup of it with two cups of low sodium chicken broth. I've made quinoa with water before, but I much prefer it when made with broth. It adds so much more flavor! Cook according to the directions on the package.


When the quinoa was super close to being done cooking, I threw in some chopped spinach so that it would wilt. Love how green that spinach is!! YUM.


At this point, the quinoa was done cooking so I turned off the heat.


Next, I added about 1/2 can of rinsed and drained small white beans.


Then I topped the quinoa, spinach, and white bean mixture with my veggies, and voila - dinner! Simple as that.

I mixed it all together before chowing down though. ;-)


SO yummy. This dish was perfect for this time of year when we're transitioning seasons - it's very warm and comforting like the type of dinner you'd want in the winter time, yet very colorful and spring-like too
for the upcoming warmer months. YAY! Successful weeknight dinner. And I had plenty leftover to eat for a few more meals too!

St. Patrick's Day is later this week! Can't wait! I've already made one batch of the Barbershop's traditional irish soda bread. This year I made it into individual scones though, as you can see here. Fun fun!


Enjoy the extra daylight we've been granted, and I'll see you again soon! :)

Saturday, March 5, 2011

Browned Butter Toffee Blondies


Hi friends and happy weekend!! :)

Last Sunday afternoon I had the itch to bake...  I mean, I get that itch a lot ;-), but it had actually been a few days since I had baked, and I didn't actually have an occasion to bake for, so I had the luxury of baking just to bake! I love to bake no matter what, but it's often the occasion for which I'm baking that dictates what I make. Not this time. I got to make whatever I wanted! I was in the mood to make a dessert...brownies or bars of some sort (I didn't feel like doing drop cookies)...so I started to sift through (haha, no pun intended) several of my cookbooks. I read several recipes in my Martha Stewart Cookies book before deciding to try her browned butter toffee blondies. Yummm.


The browned butter in this recipe adds a really nice nutty flavor to these bars. I had never baked using the browned butter technique, so it was fun to try something new! Basically you just melt the butter on the stove and cook it for a while (I think I cooked mine for about 15 minutes) until it reaches a golden brown color and smells nice n' nutty. :) This recipe does have walnuts in it, and although I don't often bake with nuts, they were oh so appropriate for this tasty treat!!

The recipe for you!

-1 and 1/4 cups (1 and 1/2 sticks) unsalted butter
-2 and 1/4 cups all-purpose flour
-1 and 1/2 tsp. baking powder
-1 and 1/2 tsp. salt
-2 cups packed light brown sugar
-1/2 cup granulated sugar
-3 large eggs
-2 and 1/2 tsp. vanilla extract
-1 cup chopped walnuts (about 4 oz.)
-1 cup toffee bits (I actually used Heath bar milk chocolate toffee bits because that's what I had on hand)

Preheat oven to 350 degrees F. Line bottom of a 13 x 9-inch baking pan with parchment paper; butter and flour parchment. In a saucepan on the stove over medium heat, cook the butter until it turns golden brown; remove from heat, and let cool. Whisk together flour, baking powder, and salt. In a large bowl, combine the browned butter and both sugars; stir with a spoon or spatula until combined. With an electric mixer, add eggs to the butter and sugar mixture, and beat on medium speed until light and fluffy, about 3 minutes. Add the vanilla, and beat to combine. Add the flour mixture, walnuts, and toffee bits, and mix until thoroughly combined. Pour into prepared pan.


Bake until a cake tester comes out clean, about 35 to 40 minutes. Transfer to a wire rack to cool completely before turning out of pan onto a cutting board. Peer off parchment paper, and cut blondies into desired size.


The cookbook says the bars can be stored in an airtight container at room temperature for up to 3 days, but I still have a few more left that have been stored for 6 days, and they still taste great. :-D Most of these I shared earlier in the week with coworkers and neighbors. Everyone enjoyed them very much!! The toffee, nutty flavor of these bars really stands out. They're a really nice sweet treat that doesn't involve chocolate. Although I do love my chocolate, there are days when that's not what I'm craving. In those cases, bars like these are perfect. ;-)


Talk to you again soon!

Thursday, March 3, 2011

Chocolate Stout Cupcakes with Kahlua Cream Cheese Frosting


Divine. Decadent. Heavenly. These are just a few words to describe the cupcakes I'm about to share with you... These aren't my own words but words of my coworkers who indulged in these cupcakes today at work as we celebrated a coworker's birthday. I have to agree with the adjectives they chose to describe these though; they are pretty amazingly delicious if I do say so myself!

As you can tell from the title, these cupcakes contain two kinds of booze...beer and kahlua. :) Good stuff, I tell ya. I really think that the stout beer enhances the chocolate flavor of the cupcakes in this recipe. The cupcakes themselves are very moist, rich, flavorful, and all around super tasty. Although I don't think the flavor of the kahlua came through in the frosting as much as I would have hoped, I have to imagine that it enhanced the deliciousness of the frosting too. Bottom line...booze in baking = a good thing.

I actually blogged about these cupcakes not far after my blog came into existence; you can read that post (it's brief!) here. I wanted to share them again though because I used a different frosting recipe this time AND because my blog has evolved quite a bit and I believe this recipe definitely deserves a lot more attention than I gave it the first time around!!

So, once again, the recipe I followed is one from Dave Lieberman of the Food Network. Read all about it here! Reviewers of this recipe on the Food Network site give it 5 stars, and I know that my coworkers and I wholeheartedly agree with that rating. The recipe says it makes 24 cupcakes, but I actually made 24 regular cupcakes, 12 mini ones, AND a small heart shaped cake (4" wide or so) with this batter. It makes a lot, folks!! You'll notice that the recipe calls for sour cream, but I chose to use light vanilla-flavored yogurt. Also, another small change I made was adding about 1 cup of mini chocolate chips to the batter. I mean, why the heck not?


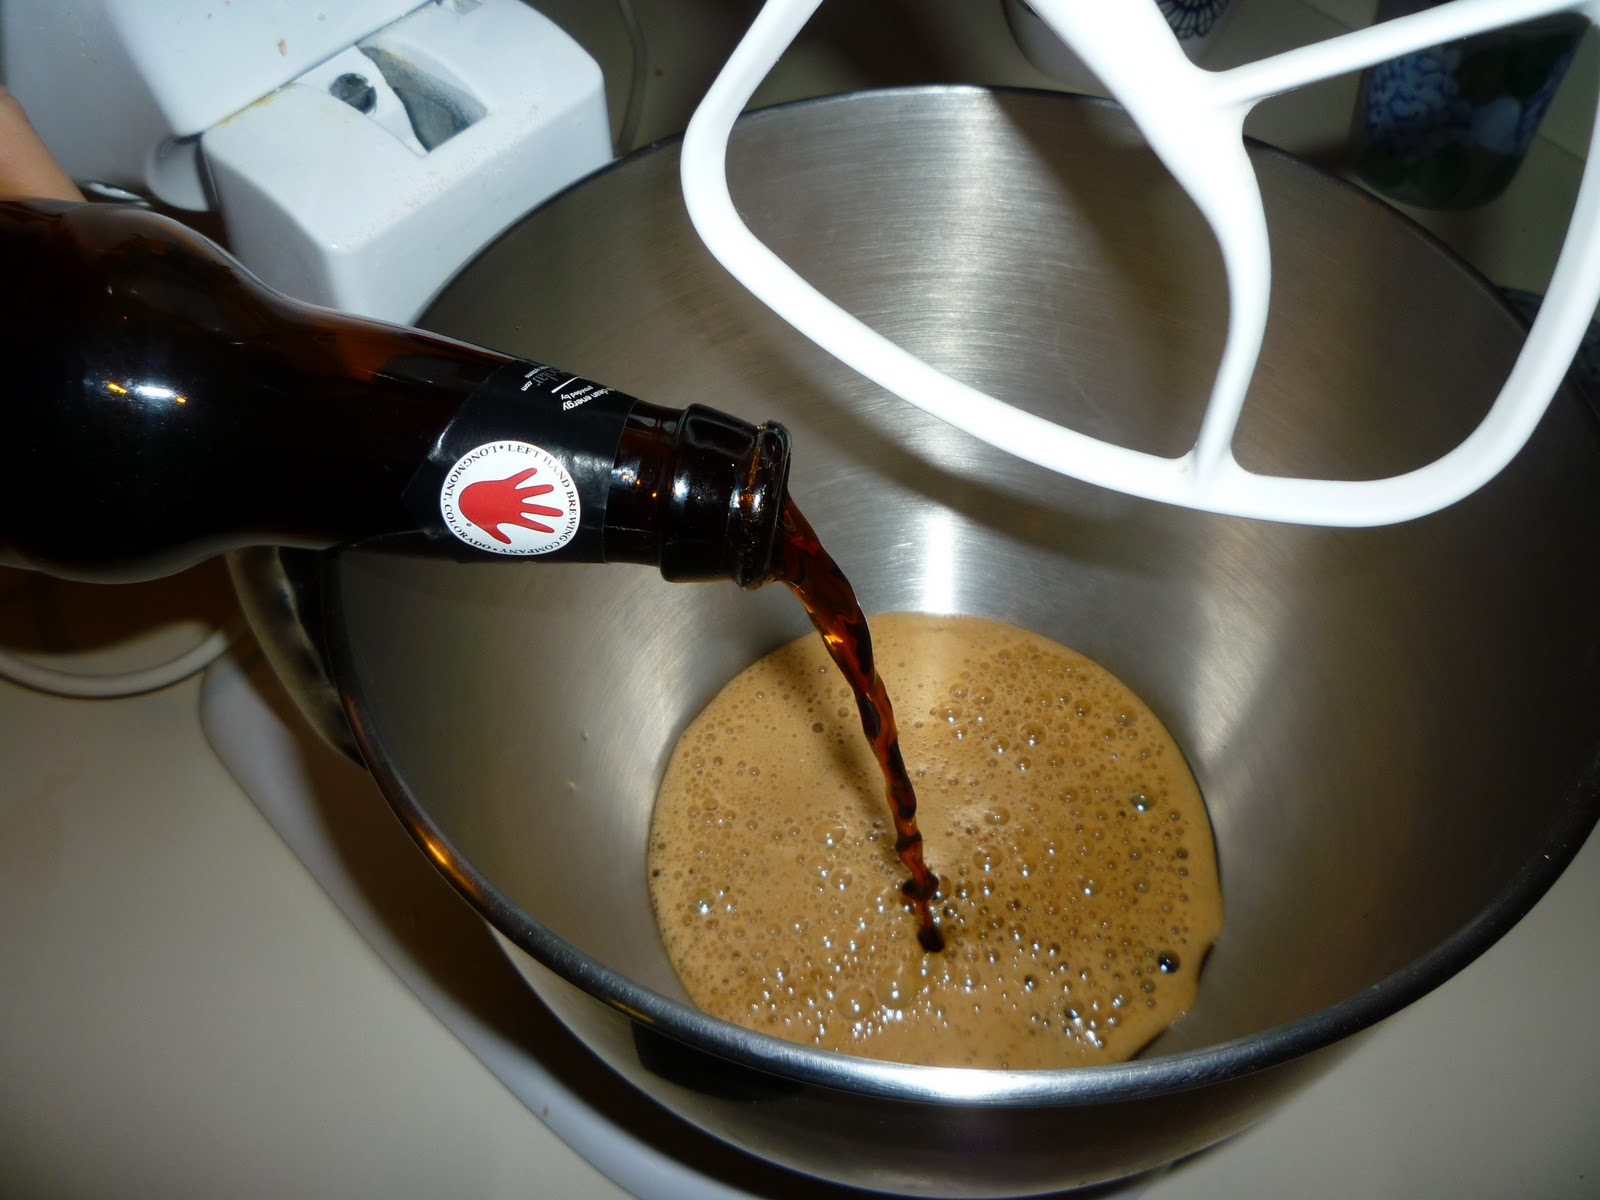
Although the recipe recommends using Guinness as the stout beer, I used a milk stout made by the microbrewery, Left Hand. Hey look - I'm even holding the beer in my left hand! Ha. I'm a dork.


This milk stout is a verrry good beer. It was a little difficult to pour it into the bowl and not drink it!!


Mmmmm, extra chocolate. :)


All baked and ready to be frosted!

I read several frosting recipes before deciding on the one I finally made. I have a bit of a problem when it comes to reading recipes and deciding on one to make... I spend a great deal of time perusing my cookbooks (I have a TON of them) and recipes online. I really enjoy reading recipes, but sometimes I spend too much time doing it because I just can't decide on what to make! Thanks to inspiration from a few different cupcake-themed cookbooks I have, here are the final ingredients I used for the frosting:

-1 stick real unsalted butter, softened
-8 oz. cream cheese (I used 1/3 less fat), softened
-2 to 2.5 cups powdered sugar, sifted
- approx. 2 to 3 Tbsp. vanilla flavored kahlua (I didn't measure it exactly; sorry!)

Beat butter and cream cheese with electric mixer; add in the powdered sugar and booze and continue to mix until everything is well-incorporated. Continue to add more powdered sugar, as needed, until the frosting reaches the desired consistency that you prefer! 


This frosting recipe made plenty to frost every last cupcake. And I still probably had 1/2 to 2/3 cup of frosting leftover. Looks like I'll have to find a use for that this weekend... Hmmmm, maybe use it as the filling for whoopie pies???

As you can see, I topped each cupcake off with a few mini chocolate chips as a "garnish." 


These cupcakes would actually be good for the upcoming holiday of St. Patrick's Day! The original recipe suggests using Guinness. If you used Guinness stout and tinted the frosting green with some food coloring, I think you'd be totally set for St. Patty's! ;-)


Here's a mini cupcake.... Delicious, I tell you!!

I actually had two other recipes I was intending to share with you in this post, but because these cupcakes got such rave reviews at work today, I decided to share this one sooner than later! Should you be curious, the current two recipes on deck are browned butter toffee bars and butternut squash mac n' cheese....  They'll be coming soon, I promise! Until then, go get yourself some stout beer and kahlua. Oh, and make these cupcakes with them. I suppose you could just drink them though. :-D

I also want to try a new St. Patty's recipe soon to share with you before the upcoming holiday. Maybe I can squeeze that in this weekend! In the meantime, you can read up on my traditional Irish soda bread from last year!

Sunday, February 27, 2011

Peanut Butter Cup Cookies


Helloooo and welcome back! Hope you are all enjoying the weekend!

Let's get right down to business here today. I want to share with you a delicious cookie recipe that I made last week..."peanut butter cup" cookies. Yes, you heard me right. Peanut butter cup!! These cookies are totally like the classic Reese's treat but in cookie form. How can you go wrong? Bottom line...you can't. ;-)

An interesting characteristic of these cookies is that they're actually vegan! I did not make them because they're vegan (I made them because they looked deeelicious), but it's an added bonus in case anyone is in search of a yummy vegan cookie recipe!

You can read the recipe here and view pictures below... As you can see, the cookies are called peanut butter pillows on the website where I got the recipe. Although I think that's a very clever name for these treats, I decided to change it up since I think they're so much like peanut butter cups!


A few more essential pieces of information to know about these cookies...  They are SUPER easy to make. Don't let the making of the two doughs fool you, nor the whole "hiding the peanut butter dough ball inside the chocolate dough" thing. It's really incredibly easy. I was a little afraid at first that it wouldn't be an easy process, but it definitely was. The chocolate cookie dough is so easy to work with!!! I thought it would be too sticky and difficult to shape around the peanut butter center. Nope. I was wrong. :-D It's also a very quick recipe to make. You can have tasty cookies in no time! Also, the recipe calls for non-dairy milk. I used almond milk because I actually had it on hand (the Almond Breeze brand). I would guess that you could use regular milk though (so long as you're not actually trying to make these vegan!). Lastly, the recipe calls for natural peanut butter. I used "regular" peanut butter (Peter Pan brand to be exact), so it doesn't necessarily have to be all-natural.

And finally, the other bit of information I wanted to share is that you should go make these right now. Go go go!!! Right now! You must! You'll be glad you did. ;-)

Sunday, February 20, 2011

Pumpkin Maple Oatmeal Cinnamon Chip Muffins with Maple Pumpkin Glaze


Pumpkin maple oatmeal cinnamon chip muffins with maple pumpkin glaze..... How's that for a mouthful? Sorry for the long title of this recipe, but it's the best I could do. ;-) It's descriptive, at least! After reading that you have a good idea of what to expect, right?!

The following recipe is an original Barbershop creation! I created this muffin recipe to submit to a King Arthur Flour contest, the Sweet Victory Bakeoff. The two main requirements for this contest were that the recipe contained King Arthur Flour and pure maple syrup. Entries could be submitted in the categories of breakfast, dessert, or savory (main dish). As you can guess, I opted for the breakfast category! To create this recipe, I did do some research by studying some other muffin recipes... However, the actual combination of ingredients and measurements was completely my own. :) Would you like to know more about it? Thought so! Here ya go...


Ingredients

Muffins:

-1 cup King Arthur whole wheat flour
-1 cup King Arthur unbleached all-purpose flour 
-3/4 cup rolled (regular) oats
-2 teaspoons baking powder
-1/2 teaspoon baking soda
-1/2 teaspoon salt
-1 teaspoon cinnamon
-1/4 cup light brown sugar
-2/3 cup pure maple syrup
-3/4 cup canned pumpkin
-3/4 vanilla flavored yogurt
-1 large egg, at room temperature
-1/4 cup vegetable oil
-3/4 cup cinnamon baking chips

Glaze:

-1/2 cup powdered sugar, sifted
-2 tablespoons pure maple syrup
-3 teaspoons canned pumpkin

Instructions


Preheat oven to 375 degrees Fahrenheit. Prepare your standard muffin pan(s) by greasing approximately 20 muffin cups or lining with muffin paper liners.

In a large mixing bowl, combine the first seven ingredients (wheat flour, all-purpose flour, oats, baking powder, baking soda, salt, and cinnamon); set aside. In a medium mixing bowl, whisk together the brown sugar, maple syrup, pumpkin, yogurt, egg, and vegetable oil until well combined. Add the wet ingredients to the dry ingredients and mix by hand until everything is incorporated, but be careful not to over-mix. Stir in the cinnamon chips. Scoop the batter into your prepared muffin pan(s), filling each muffin cup approximately 2/3 full.

Bake for approximately 14 to 16 minutes or until toothpick inserted into the center comes out clean and the middle of a muffin springs back when touched (cooking times may vary per oven). Let muffins rest in pan for 5 minutes before removing from the pan to let them cool completely on a cooling rack.

To prepare the glaze, whisk together the powdered sugar, maple syrup, and pumpkin until the mixture is smooth without any lumps. Use a spoon to drizzle the glaze on top of the muffins.

Allow muffins to sit and cool completely (at least 2 to 3 hours) before storing in an airtight container, and use a container that is large enough so that the muffins have room to “breathe.” This will prevent the muffins from becoming soggy.

Yield: Approximately 18 to 20 muffins

Above is exactly what I submitted for the contest. It seems so formal for the blog though. :-P Now I'll share my usual array of pictures....


A few thoughts for you...

Although I've listed the two flours (wheat and all-purpose) as being King Arthur brand, they certainly don't need to be! That was obviously for the purposes of the contest. Also, any brand of vanilla flavored yogurt should be a-okay.

What I love about this recipe is...well, a few things. :)  1) It is very simple!! There's no need for a mixer; everything can be done by hand. I will note that there are several ingredients involved. However, none of them are odd or hard to work with or anything, so don't let that list of ingredients intimidate you.  2) The flavor combination of pumpkin, maple, and cinnamon is just plain delicious! I think maple and cinnamon especially pair well in breakfast items, and that was part of the reason I chose to add both ground cinnamon and cinnamon chips. That being said though, the maple flavor is very subtle in this recipe. It doesn't necessarily stand out. In fact, if you want to feed these to anyone who doesn't care for maple, I am pretty sure they will still really enjoy these muffins!  3) These muffins are moist, fluffy, and hearty all at the same time. I personally like muffins with those qualities and hope you do too.  4) I like these because they were fun to create on my own! Regardless of whether I do well in the contest or not, it was a really unique baking experience for me to not follow a recipe from another source. You should try it sometime yourself!! ;-)


Close-up of the maple pumpkin glaze....yummm. This is good stuff.


A shot of the inside - moist and fluffy!!

Finally, I would be remiss if I didn't post a picture of the ingredient that inspired this recipe even though it wasn't necessarily prominent in the final flavor of the muffins...pure maple syrup! And of course, I used the BEST stuff from New York. ;-)


Oh, and I did make this recipe a few times to get it just right...  One time I made a few muffin tops instead of muffins! I used the new, fun muffin top pan that my sister gave me. :) Thanks, sista!


Will let you know if I do well in the King Arthur Flour contest! Keep your fingers crossed for me, please. :)

PS - Check out this recipe over at Lisa's Sweets for a Saturday where TONS of other delicious treats can be found too! ;-)