Hi friends!
Just a quick post to inform you that I finally have a Recipe Index page for you (see the tab right below the blog title?)! Sorry it's taken me so long to get this together. Hopefully this will make it much easier for you to browse and find recipes on my blog. I categorized all my recipes as best I could. Let me know what you think!
I also made a few changes to my "About Me" section and made that a separate page as well.
I'll have more pumpkin recipes coming your way this week... Pumpkin pancakes and pumpkin mac n' cheese are on deck!
Have a great Monday! :)
-Colleen (aka Barbershop)
A blog written by a Boston blogger who loves to bake and believes that life is good. :) I invite you to stop by often and enjoy my simple and delicious recipes, made with everyday ingredients!
Monday, October 17, 2011
Sunday, October 16, 2011
Pumpkin Biscuits
Hope everyone is having a wonderful weekend. It's very fall-like in Boston with cooler temps and leaves falling to the ground. Love it... :)
I've been on quite the pumpkin kick lately (no huge surprise there!). This weekend I made pumpkin pancakes, and last week I made both pumpkin mac n' cheese and these pumpkin biscuits. Both were delicious!! These biscuits could easily serve as a biscuit that goes with dinner (which these did for us) OR they could be a breakfast biscuit too since they're actually on the sweeter side.
I found this recipe from a blog I love, Sugarcrafter. You really should go check out her blog! She posts some amazing recipes. I've written the recipe for you here too though for ease of reference. A couple points of note... This recipe was very simple. It took no time at all to put together the biscuit dough, and they don't take much time in the oven either. Gotta love a super simple homemade recipe that you can quickly get on the table for a weeknight dinner! Also, the recipe calls for 2 cups of all-purpose flour. I ended up using 1 cup of all-purpose and 1 cup of white whole wheat flour from King Arthur Flour.
Ingredients:
-2 cups all-purpose flour (or half AP & half whole wheat)
-1 Tbsp. baking powder
-3/4 tsp. salt
-2 Tbsp. brown sugar
-1/2 tsp. cinnamon
-1/4 tsp. nutmeg
-2 Tbsp. butter
-3/4 cup pumpkin puree
-1/2 cup milk (I used 1%)
-2 Tbsp. maple syrup
Instructions:
Preheat oven to 450 degrees, and line a baking sheet with parchment paper. In a large bowl, whisk together the flour, baking powder, salt, brown sugar, and spices. Blend in the butter using a pastry blender (I just used a fork). In a medium bowl, combine the pumpkin, milk, and maple syrup.
Combine the wet and dry ingredients, and stir until the mixture holds together. Knead lightly on a floured surface and roll out to 1" thickness. Using a biscuit cutter (2" or whatever size you have), cut the dough into circles. Be sure to use all the dough by rolling together all the scraps (if you have to make a slightly smaller or mis-shapen biscuit to use the scraps, no big deal; I made a super small one so I could taste test the biscuit and make sure they passed the test to share with others!).
Place on parchment paper and bake for 12 - 14 minutes or until lightly golden brown. Serve warm, if desired. The recipe makes approximately six biscuits.
I used a pumpkin shaped cookie cutter as my biscuit cutter!
Served with my pumpkin mac n' cheese and some sauteed swiss chard and cabbage on the side.
Yum yum! Now if you make this recipe and still have some canned pumpkin leftover, be sure to check out my previous post about ideas for using up that extra pumpkin!
Friday, October 14, 2011
Ways to Use Extra Canned Pumpkin! (Plus a Marathon Recap!)
Hi friends and happy Friday! In lieu of a Friday Favorites, I thought I'd switch it up a bit and write about an issue that is dear to my heart. I care very much about this problem that many people have, and I hope you do too. What problem is that, might you wonder? Well, it's the issue that occurs for me every fall. It's the leftover canned pumpkin problem! I love baking with pumpkin, but it's almost inevitable that a recipe never calls for quite enough pumpkin to use up a full 15 oz. can, and it certainly won't call for enough pumpkin to use one of those huge 32 oz. cans! And this brings me to the aforementioned problem of figuring out what to do with the leftover pumpkin... Below are a few things that I do with that extra pumpkin that I have after almost every time I bake with it! (Oh, and read on all the way to the end if you're interested in my marathon recap!)
By the way, you can refrigerate leftover pumpkin for probably up to a week. I'd recommend using it before too much time passes. I've read that you can freeze canned pumpkin too, and I did try that last year, but it ended up being very watery for some reason when I thawed it, so I haven't tried that again. Instead, I just make a point to use up the leftovers as soon as I can! :)
1) Make pumpkin yogurt!
If you have plain or vanilla yogurt, why not jazz it up a bit to make pumpkin yogurt? Simply add the amount of canned pumpkin you like to your yogurt and stir! For a 6 oz. yogurt container, I probably add about 1 or 2 tablespoons full. Add a dash of cinnamon too, and you're good to go! You've got an already healthy snack turned extra healthy with all the nutrients from the pumpkin.
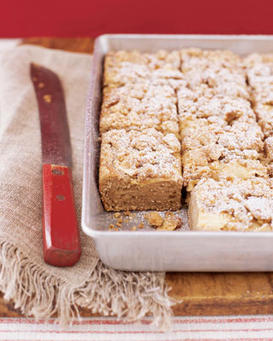
2) Make pumpkin oatmeal!
Last fall I posted about making homemade pumpkin oatmeal. This is another great way to use up some leftover pumpkin!
3) Make a pumpkin-flavored smoothie!
To use some extra pumpkin last week, I whipped up my own version of a "pumpkin pie" type smoothie. I added one frozen banana, about 1/2 cup of milk, 1/4 to 1/3 cup of pumpkin, a couple teaspoons of maple syrup, and a few very generous sprinkles of cinnamon and nutmeg. Deeelish! So refreshing and healthy.
4) Make a pumpkin spice latte at home!
I did this a couple weeks ago, and it was tasty! I didn't love the recipe I used, but I did like it. If I try it again, I may tweak it a bit.
5) Make pumpkin cream cheese!
(photo source)
I haven't done this yet, but it's on my list of ideas for using up that pumpkin. So easy!
Now, onto a quick recap of my first marathon!
I ran the Mohawk Hudson Marathon this past Sunday, October 9th. It was unseasonably warm for October (temps reached over 80!) but in the end, the heat wasn't too terrible although I did feel it during the race. All in all, it went fairly well. I finished in under four hours (3 hours, 51 minutes, and 17 seconds to be exact - works out to be an 8:50 mile pace), and people tell me that under four hours is great. I secretly hoped to run a little faster (my training runs had been around an 8:30 pace), but hey, what can you do? I didn't feel like I was having the best of running days in general (and that sometimes happens, right runners?), and I am also pretty sure that I started out too fast which led me to slow down quite a bit in the second half. So clearly I have to better learn about that whole pacing yourself thing. ;) Haha. I was just so excited in the beginning and couldn't help but go faster! It was a very well organized race, and the scenery along the way was great too (a good "distraction" while running!). Much of the race takes place on a bike path that follows along portions of the Mohawk and Hudson Rivers. The trees were gorgeous fall colors with a lot of bright oranges, reds, and yellows.
And the other thing that helped make things more bearable was my wonderful family and friends! My mom, dad, aunt, sister, brother, future in-laws, fiance, and four friends all came to cheer me on along the way. That helped immensely! I saw some of them roughly every 4 or 5 miles, and it was a huge boost every time I saw them. They made awesome signs for me and handed me my beloved sport beans to keep me energized. Everyone provided amazing support, and I am so thankful for it!
A few pics...
(photo source)
This was early on when I still looked normal and was "hanging with the guys" (in this picture at least!) at a faster pace (that sadly, I could not keep up).
This is my wonderful fiance, Mike, who ran with me for the last 5 miles! He was not planning to do that, but when I had seen my family at the 14-mile mark, I had spoken the words "it's not going well" to my sister and Mike. So Mike figured I could use a little support to get through the last 5 miles, and he was right! When I turned the corner at mile 21 to go on for the last 5 miles along the bike path, Mike was there to join me. He ran with me despite the fact that he didn't plan to and therefore didn't have appropriate running clothes or footwear! If that's not a sign of true love, I don't know what is. ♥
Phew. I'm tired in this pic. That's my awesome sister next to me! :) She, unfortunately, couldn't run the marathon like she was planning to due to a leg stress injury. Here's to wishing her a speedy, smooth recovery! She was wonderfully supportive during my training and on race day. Thanks, sista!
My finisher's medal!
Will I run another marathon? I'm not sure. Within 5 minutes after the race, I'm pretty sure that I told everyone I'd never do another. Now that it's 5 days later, I'm not quite as sold on not doing another... But, for the time being, I do think I'll focus on my preferred distance, which is the half marathon. I've done two so far, and they were much more enjoyable for me. But don't get me wrong; the entire experience of training and completing a marathon was quite rewarding, and I am glad to have done it!
Tell me, have you ever run a half or full marathon? What are your thoughts on these distances?
And also tell me, what do you do with your leftover pumpkin?! Curious minds like mine wonder what other great ideas are out there for using this delicious ingredient!!
Thursday, October 13, 2011
Pumpkin Chocolate Chip Bars
Aren't these fun cookie cutters? I have a great selection, thanks to some my mom bought for me this year and some I bought last year. Love these kinds of festive kitchen items!!
Ingredients:
-2 cups all-purpose flour
-1 Tbsp. pumpkin-pie spice (for this, I added my own mix of approx. 1 and 1/2 tsp. cinnamon, 1/2 tsp. nutmeg, 1/4 tsp. cloves; and yes, I realize this doesn't add up to 1 Tbsp.!)
-1 tsp. baking soda
-3/4 tsp. salt
-1 cup (2 sticks) unsalted butter, at room temperature
-1 and 1/4 cups sugar
-1 large egg
-2 tsp. vanilla
-1 cup canned pumpkin puree
-1 12 oz. package semi-sweet chocolate chips (I only added about 1.5 cups, 12 oz. is a LOT of chocolate chips!)
Instructions:
Instructions:
Preheat oven to 350 degrees. Line a 13 x 9 pan with tin foil (leaving an overhang of foil on all sides) and grease the foil (the original recipe doesn't actually say to grease it, but I did with cooking spray). In a medium bowl, whisk together the flour, spices, baking soda, and salt; set aside. With an electric mixer, cream together the butter and sugar until smooth, and then mix in the egg and vanilla until everything is combined. Beat in the pumpkin puree (the mixture may appear curdled - don't worry if this is the case!). With the mixer on low, incorporate the dry ingredients. Lastly, stir in the chocolate chips.
Spread batter evenly into the prepared pan. Bake for about 35 - 40 minutes, or until edges start to pull away from the sides of the pan and a toothpick inserted in the center comes out clean. Cool completely in the pan before lifting the bars out of the pan using the foil. Cut bars into desired size.
I thought it'd be fun to cut a portion of this batch using my cookie cutters! It's always fun to switch it up from the normal squares or rectangles. (By the way, sorry for the not-so-great-quality pictures...I took some of these late at night and had no natural light with which to work!)
These bars are incredibly easy to make, and they are very moist and flavorful. Personally, I think they're better the day after baking them, as the flavors seem to come through better after they've sat for a while. I also would venture to guess that they'd be quite yummy with other types of baking chips too...perhaps butterscotch or cinnamon?! :)

Go ahead and give them a try! Feed them to your family or bring them to your coworkers. Everyone will love them. I promise. ;-)
Wednesday, October 5, 2011
Blogging Speed Bump & Fall Treats!
I've hit a blogging speed bump, friends. No, it's not that I have a lack of recipes to share with you. It's that I don't have a home laptop at the moment with which to share my recipes! I have been without the laptop since last Thursday, and as a result, I haven't been able to blog about the delicious fall recipes I've been making. Sadness! :( I suppose I could put all my food pics on my work computer and blog here, but I'm going to hold off on that (I am blogging right now at work though - whoops! I'm done work for the day though ;-)).
So I thought I'd just briefly tell you about a few things I did recently make...
A delicious recipe from Martha Stewart! They are SUPER moist and yummy.
2) Apple Crumb Muffcakes
I am calling them muffcakes because I have eaten one both for breakfast and for dessert. So, they're really a combination of a muffin and a cupcake. ;-)
I don't have a picture for you, but let's say they look something like but this in muffcake form:
3) Butternut Squash Apple Soup!
I took this pic with my phone the other night. It's not great, but it's something! I loosely followed (from memory) the recipe for this soup that I posted on the blog last year.
How awesome is the plate I used for my toasted slice of When Pigs Fly bread? I got the Six Grain & Pumpkin Seed kind. Aaaamazing.
Oh, and today I found this recipe for apple pie pop-tarts with cinnamon glaze. Helloooo! These look so delicious and fun! I really want to make these...
(photo from The Baker Chick)
I hope to return to you next week with the real recipes I've been making! There's a good chance I won't post a Friday Favorites this week either. Sorry. :(
Hope everyone's having a fabulous October so far!
Friday, September 30, 2011
Friday Favorites, 9.30.11
TGIF to you! Did you know that during this past week, we had two very important "holidays"? Well, on Wednesday it was National Drink a Beer Day (which I did, don't worry!), and Thursday was National Coffee Day (yes, I had a cup in celebration!). Since two of my favorite types of beverages were honored this past week (don't worry; I enjoy each of them in moderation :)), I thought I'd share a few of my own Barbershop blog recipes that have featured or involved these two beverages.
You cannot go wrong with these cupcakes - I promise! The stout is what makes them great, I'm convinced. ;-)
What a delicious savory bread! And it's super easy and quick to make.
Mike and I make this bread with the spent grains after we're done making our home-brewed beer. It's a hearty, tasty bread - and obviously a great way to not waste any grains!
When searching through my blog, I realized I've only ever shared one recipe that used coffee as an ingredient! I've made other recipes with coffee in the past, but I guess I just haven't put them on the blog. This mocha frosting is amazing!! I made it for the darn good chocolate cupcakes I made for my grandmother's surprise 85th birthday party this past spring.
And I also wanted to share two recipes I recently found that involve coffee and beer (not together!!)... I haven't made these yet, but I hope to.
(photo from The Pastry Affair)
Doesn't that look amazing? The pumpkin spice latte is probably my favorite specialty drink from Starbucks, so I can't wait to try making my own at home! I haven't had one from "the 'buck," as I like to call it, yet this year. Gotta get on that! Or, I just need to make my own at home apparently. :)
Lastly, through Pinterest, I recently found this beer cheese dip that looks deeelicious. It's from a fun blog, The Tidy Mom.
(photo from The Tidy Mom).
Woohoo, there you have it - some tasty treats made with beer or coffee in honor of this week's past "holidays." Have a fabulous weekend!
Wednesday, September 28, 2011
Homemade Pumpkin Ice Cream
As promised, here's that homemade pumpkin ice cream recipe for you! It's the second recipe I've made using my new ice cream maker. And it was another success, just like the first one - peanut butter chip! :)
This recipe is from the book my sister gave me for my birthday, The Complete Idiot's Guide to Homemade Ice Cream (should I be concerned she gave this book to ME?).
Ingredients:
-1 (15 oz.) can pumpkin
-1 tsp. cinnamon
-3/4 tsp. ginger
-3/4 tsp. nutmeg
-3/4 cup sugar
-3 cups whole milk
-2 cups heavy cream
Instructions:
Place all ingredients in mixing bowl and mix until well blended. Cool mixture in fridge until it reaches 40 degrees Fahrenheit. Transfer mixture to your ice cream maker and follow instructions. I let my machine go for about 15 - 20 minutes, and then it was ready!
Of note, I used whole milk in this recipe, but the cookbook actually calls for half-and-half. The reason I used whole milk was that I already had it on hand (leftover from the peanut butter chip ice cream recipe!). I did a quick google search and decided that whole milk was a "close enough" substitution to half-and-half. Luckily my gamble was okay, and the ice cream was delicious! Next time, however, I'd probably try it with half-and-half just to see if it's any different.
Weeeeee, the ingredients go round and round...
Here's the ice cream right out of the machine. It's a softer texture at this point, which I love. Soooo good. I kinda wish I could eat the entire two quarts in one sitting...
After freezing it, it does become harder but the flavors are still amazing! I still have some in my freezer actually. I had some last night with some hot apple cider as a treat before bed. Talk about awesome fall flavors! The cinnamon and nutmeg really come through in this ice cream.
Isn't this a lovely cake? A couple weeks ago my coworkers surprised me with this cake to congratulate Mike and me. How sweet!! It was super delicious too.
Cake & ice cream:
The best combo!
By the way, do you remember when I talked about the shortage of pumpkin? Well, not to worry - my sister, mom, and future mother-in-law have all come to the rescue for me!! My sister gave me a big can of pumpkin she had in her pantry, and my mom and future mother-in-law both found some in stores near them and bought several cans for me. PHEW! Thank goodness (and thanks so much to them!). No more shortage of pumpkin for a while. I think I have the equivalent of about 12 15-oz. cans now! I've got some baking to do. :)
Monday, September 26, 2011
Banana Cupcakes with Honey Cinnamon Frosting
Hi there! I made these cupcakes last week for a get-together with my fiancé's coworkers (I'm still getting used to saying fiancé!). The recipe is from my new Martha Stewart cupcake book, so I was quite excited to try it! Ya gotta love when a new recipe is a success. Read on to the end to see my full impressions! :)
Ingredients:
Cupcakes:
-3 ripe bananas (roughly 1.5 cups of mashed banana)
-2 cups cake flour*
-1/2 tsp. baking soda
-1/2 tsp. baking powder
-3/4 tsp. salt
-3/4 tsp. cinnamon (I added this; it wasn't in the original recipe)
-1/2 cup (1 stick) unsalted butter, at room temperature
-3/4 cup sugar
-3 large eggs, separated
-1/2 cup sour cream (I used banana flavored yogurt instead)
-1 tsp. vanilla extract
*If you do not have cake flour, I recently discovered an awesome substitute for it! You just need all-purpose flour and cornstarch. Check it out here. ;-)
Frosting:
-2 and 1/2 cups confectioners' sugar, sifted
-1 cup (2 sticks) unsalted butter, at room temperature
-2 Tbsp. honey
-1/4 tsp. ground cinnamon (I probably added closer to 1/2 tsp.)
Instructions:
Preheat oven to 350. Line standard muffin tins with paper liners. Sift together cake flour, baking soda, baking powder, and salt. With an electric mixer on medium-high speed, cream butter and sugar until pale and fluffy. Add egg yolks, one at a time, beating until each is incorporated, scraping down sides of bowl as needed. Add the bananas, and beat to combine. Add flour mixture in three batches, alternating with two additions of the sour cream (or yogurt), and beating until just combined after each. Beat in vanilla.
In another mixing bowl, with an electric mixer on medium speed, whisk egg whites to soft peaks; fold one-third of the whites into batter to lighten. Gently fold in remaining whites in two batches.
Divide batter evenly among lined cups, filling each 3/4 full. Bake until a cake tester inserted comes out clean, about 15 - 20 minutes. Transfer to cooling rack to cool completely. Cupcakes can be stored up to 3 days at room temperature, or frozen up to 2 months, in airtight containers.
This recipe made 12 cupcakes and 3 mini bundt cakes for me.
For the frosting, with an electric mixer on medium speed, beat all ingredients until smooth. Use immediately, or refrigerate up to 5 days in an airtight container. Before using, bring to room temperature and beat until smooth.
So as I said, this recipe was definitely a success. I would make it again! However, I have a couple points to share... 1) The cupcake itself was very yummy but it was rather muffin-like at the same time. The frosting is really what made these cupcakes, if you ask me. ;-) 2) I did not follow the cupcake recipe exactly... As you may have read earlier, I added cinnamon (which was a great choice, I think!) and I used banana yogurt instead of sour cream (also a good choice!).
What I did not do, though, was roast the bananas. You see, this recipe is actually for roasted banana cupcakes. Yep! I think that probably would have enhanced the banana flavor of these even more, which would be great. I did not have enough ripe bananas on hand to roast, however. What I always have on hand though is frozen ripe bananas, and that's what I used in this recipe. Whenever my bananas go ripe and I don't have enough free time to bake with them, I cut them up and freeze them to use later (just let them thaw before using them). So, sadly, I didn't get the full experience of making these cupcakes with roasted bananas. Guess I'll just have to make them again! Or, perhaps you can try making these with roasted bananas and let me know what you think. To roast the bananas, heat the oven to 400 degrees, and roast 3 whole (unpeeled!) bananas on a baking sheet for about 15 minutes. Let them cool before peeling.
Oh, and this honey cinnamon frosting? Amazing. Loved it. It's definitely what makes these cupcakes, in my opinion. The frosting recipe is certainly a keeper to use with other cake flavors! Perhaps with carrot cake instead of a traditional cream cheese frosting? YUM! I can taste it now.
K, friends, that's it! Hope everyone's week is off to a good start so far!
Subscribe to:
Posts (Atom)