Pages

Friday, September 30, 2011

Friday Favorites, 9.30.11

TGIF to you! Did you know that during this past week, we had two very important "holidays"? Well, on Wednesday it was National Drink a Beer Day (which I did, don't worry!), and Thursday was National Coffee Day (yes, I had a cup in celebration!). Since two of my favorite types of beverages were honored this past week (don't worry; I enjoy each of them in moderation :)), I thought I'd share a few of my own Barbershop blog recipes that have featured or involved these two beverages.


You cannot go wrong with these cupcakes - I promise! The stout is what makes them great, I'm convinced. ;-)


What a delicious savory bread! And it's super easy and quick to make.


Mike and I make this bread with the spent grains after we're done making our home-brewed beer. It's a hearty, tasty bread - and obviously a great way to not waste any grains!


When searching through my blog, I realized I've only ever shared one recipe that used coffee as an ingredient! I've made other recipes with coffee in the past, but I guess I just haven't put them on the blog. This mocha frosting is amazing!! I made it for the darn good chocolate cupcakes I made for my grandmother's surprise 85th birthday party this past spring.

And I also wanted to share two recipes I recently found that involve coffee and beer (not together!!)... I haven't made these yet, but I hope to.


(photo from The Pastry Affair)

Doesn't that look amazing? The pumpkin spice latte is probably my favorite specialty drink from Starbucks, so I can't wait to try making my own at home! I haven't had one from "the 'buck," as I like to call it, yet this year. Gotta get on that! Or, I just need to make my own at home apparently. :)

Lastly, through Pinterest, I recently found this beer cheese dip that looks deeelicious. It's from a fun blog, The Tidy Mom.


(photo from The Tidy Mom).

Woohoo, there you have it - some tasty treats made with beer or coffee in honor of this week's past "holidays." Have a fabulous weekend!

Wednesday, September 28, 2011

Homemade Pumpkin Ice Cream


As promised, here's that homemade pumpkin ice cream recipe for you! It's the second recipe I've made using my new ice cream maker. And it was another success, just like the first one - peanut butter chip! :)

This recipe is from the book my sister gave me for my birthday, The Complete Idiot's Guide to Homemade Ice Cream (should I be concerned she gave this book to ME?).

Ingredients:

-1 (15 oz.) can pumpkin
-1 tsp. cinnamon
-3/4 tsp. ginger
-3/4 tsp. nutmeg
-3/4 cup sugar
-3 cups whole milk
-2 cups heavy cream

Instructions:

Place all ingredients in mixing bowl and mix until well blended. Cool mixture in fridge until it reaches 40 degrees Fahrenheit. Transfer mixture to your ice cream maker and follow instructions. I let my machine go for about 15 - 20 minutes, and then it was ready!

Of note, I used whole milk in this recipe, but the cookbook actually calls for half-and-half. The reason I used whole milk was that I already had it on hand (leftover from the peanut butter chip ice cream recipe!). I did a quick google search and decided that whole milk was a "close enough" substitution to half-and-half. Luckily my gamble was okay, and the ice cream was delicious! Next time, however, I'd probably try it with half-and-half just to see if it's any different.


Weeeeee, the ingredients go round and round...


Here's the ice cream right out of the machine. It's a softer texture at this point, which I love. Soooo good. I kinda wish I could eat the entire two quarts in one sitting...

After freezing it, it does become harder but the flavors are still amazing! I still have some in my freezer actually. I had some last night with some hot apple cider as a treat before bed. Talk about awesome fall flavors! The cinnamon and nutmeg really come through in this ice cream.

Isn't this a lovely cake? A couple weeks ago my coworkers surprised me with this cake to congratulate Mike and me. How sweet!! It was super delicious too.


Cake & ice cream:


The best combo!


By the way, do you remember when I talked about the shortage of pumpkin? Well, not to worry - my sister, mom, and future mother-in-law have all come to the rescue for me!! My sister gave me a big can of pumpkin she had in her pantry, and my mom and future mother-in-law both found some in stores near them and bought several cans for me. PHEW! Thank goodness (and thanks so much to them!). No more shortage of pumpkin for a while. I think I have the equivalent of about 12 15-oz. cans now! I've got some baking to do. :) 

Monday, September 26, 2011

Banana Cupcakes with Honey Cinnamon Frosting


Hi there! I made these cupcakes last week for a get-together with my fiancé's coworkers (I'm still getting used to saying fiancé!). The recipe is from my new Martha Stewart cupcake book, so I was quite excited to try it! Ya gotta love when a new recipe is a success. Read on to the end to see my full impressions! :)

Ingredients:

Cupcakes:
-3 ripe bananas (roughly 1.5 cups of mashed banana)
-2 cups cake flour*
-1/2 tsp. baking soda
-1/2 tsp. baking powder
-3/4 tsp. salt
-3/4 tsp. cinnamon (I added this; it wasn't in the original recipe)
-1/2 cup (1 stick) unsalted butter, at room temperature
-3/4 cup sugar
-3 large eggs, separated
-1/2 cup sour cream (I used banana flavored yogurt instead)
-1 tsp. vanilla extract

*If you do not have cake flour, I recently discovered an awesome substitute for it! You just need all-purpose flour and cornstarch. Check it out here. ;-)

Frosting:
-2 and 1/2 cups confectioners' sugar, sifted
-1 cup (2 sticks) unsalted butter, at room temperature
-2 Tbsp. honey
-1/4 tsp. ground cinnamon (I probably added closer to 1/2 tsp.)

Instructions:

Preheat oven to 350. Line standard muffin tins with paper liners. Sift together cake flour, baking soda, baking powder, and salt. With an electric mixer on medium-high speed, cream butter and sugar until pale and fluffy. Add egg yolks, one at a time, beating until each is incorporated, scraping down sides of bowl as needed. Add the bananas, and beat to combine. Add flour mixture in three batches, alternating with two additions of the sour cream (or yogurt), and beating until just combined after each. Beat in vanilla.

In another mixing bowl, with an electric mixer on medium speed, whisk egg whites to soft peaks; fold one-third of the whites into batter to lighten. Gently fold in remaining whites in two batches.


Divide batter evenly among lined cups, filling each 3/4 full. Bake until a cake tester inserted comes out clean, about 15 - 20 minutes. Transfer to cooling rack to cool completely. Cupcakes can be stored up to 3 days at room temperature, or frozen up to 2 months, in airtight containers.


This recipe made 12 cupcakes and 3 mini bundt cakes for me.


For the frosting, with an electric mixer on medium speed, beat all ingredients until smooth. Use immediately, or refrigerate up to 5 days in an airtight container. Before using, bring to room temperature and beat until smooth.


So as I said, this recipe was definitely a success. I would make it again! However, I have a couple points to share... 1) The cupcake itself was very yummy but it was rather muffin-like at the same time. The frosting is really what made these cupcakes, if you ask me. ;-) 2) I did not follow the cupcake recipe exactly... As you may have read earlier, I added cinnamon (which was a great choice, I think!) and I used banana yogurt instead of sour cream (also a good choice!).

What I did not do, though, was roast the bananas. You see, this recipe is actually for roasted banana cupcakes. Yep! I think that probably would have enhanced the banana flavor of these even more, which would be great. I did not have enough ripe bananas on hand to roast, however. What I always have on hand though is frozen ripe bananas, and that's what I used in this recipe. Whenever my bananas go ripe and I don't have enough free time to bake with them, I cut them up and freeze them to use later (just let them thaw before using them). So, sadly, I didn't get the full experience of making these cupcakes with roasted bananas. Guess I'll just have to make them again! Or, perhaps you can try making these with roasted bananas and let me know what you think. To roast the bananas, heat the oven to 400 degrees, and roast 3 whole (unpeeled!) bananas on a baking sheet for about 15 minutes. Let them cool before peeling.

Oh, and this honey cinnamon frosting? Amazing. Loved it. It's definitely what makes these cupcakes, in my opinion. The frosting recipe is certainly a keeper to use with other cake flavors! Perhaps with carrot cake instead of a traditional cream cheese frosting? YUM! I can taste it now.

K, friends, that's it! Hope everyone's week is off to a good start so far!

Friday, September 23, 2011

Wednesday, September 21, 2011

Baked Apricot Maple Chicken with Sauteed Apples and Roasted Butternut Squash

Is it just me or does the name of this recipe scream fall? Yay for autumn! It's officially just two days away. Come Friday, we'll be into my favorite season... Woohoo!

I made this dish last night to bring to a small dinner party with six people. It was the perfect amount for everyone! A few people had second helpings, and by the end, the entire dish was gone.... So, I guess it was yummy?! :)

I receive several cooking magazines and I love reading them. However, I will admit that I'm guilty of not making recipes from my magazines very often. :( I am making an effort to use recipes from my magazines more often, and this dish is an example of that effort! Of course, though, I did change the recipe... It's actually originally a recipe for pork, but I chose to use chicken instead because it was on sale at the grocery store! Pork was not on sale this week. I like to save money whenever I can; what can I say?


The dish is from the September 2011 issue of Cooking Light, and in there it's the recipe for "roasted pork tenderloin and maple-glazed apples" (for any of you Cooking Light subscribers!). I'll share the recipe as I made it though. Most of the measurements are approximate...I didn't really measure. Sorry! This is so not how I bake. I'm much more precise in that area. ;-) Oh, and I chose to just add the squash as a little extra since it went so well with all the other flavors.

Ingredients:

For chicken:
-approximately 2.5 - 3 lbs. chicken breasts
-approx. 2 Tbsp. extra virgin olive oil
-approx. 1 - 2 Tbsp. white wine vinegar
-approx. 3 Tbsp. pure maple syrup
-approx. 3 Tbsp. apricot jam (or another jam of your choice!)
-salt and pepper
-fresh rosemary, thyme, and/or other herbs

For apples:
-3 or 4 medium apples (I used macintosh)
-1 small yellow onion
-1 Tbsp. butter or margarine
-3 Tbsp. pure maple syrup
-1 Tbsp. fresh lemon juice
-salt and pepper
-cinnamon

For squash:
-1 lb. butternut or winter squash (I used a combination of these two types), peeled and chopped into 1/2 - 1" cubes
-extra virgin olive oil
-salt and pepper
-fresh rosemary

Instructions:

Prepare your chicken and squash first so they can be roasting while you're cooking the apples on the stovetop. Preheat oven to 375 degrees. For the chicken, I cut the breasts into 1/3 - 1/2 lb. pieces and put them in a 13 x 9 glass baking dish (I had sprayed it with cooking spray first). In a small dish, combine the olive oil, vinegar, maple syrup, jam, salt, and pepper (use your judgment with how much). Once the liquid mixture is combined thoroughly, spread it evenly with a spoon over top the chicken breasts. Sprinkle fresh rosemary and thyme (or other herbs!) on top of that. I probably used a couple teaspoons of each of those two herbs. Bake the chicken for about 20 - 25 minutes or until cooked thoroughly and not pink in the middle. Cooking time will vary depending on the size of the breasts you prepare. Just be careful not to overcook so the chicken doesn't become dry! 


For the squash, place it in a baking dish and sprinkle with olive oil and your chosen spices. Bake for at least 30 minutes - maybe up to 45 minutes. The cooking time will vary here depending on the size of the squash pieces you cut. Check the squash's doneness by sticking a fork in it; if it goes through easily, it's done! Oh, and by the way, quick tip on peeling a squash such as this one pictured below... These things are so darn annoying and difficult to peel! It can be made easier if you microwave the squash first. Pierce it with a knife in a few places, and for a smaller squash like this one, just microwave it for 2 or 3 minutes, let it cool for a bit, and then use your knife to carefully cut off the outside peel. It will be soooo much easier if you microwave it than not. I promise!


While those two items are baking, prepare your apples. I kept the skins on my apples, but if you'd like, you can remove the skins. Cut each apple into 8 or 10 slices. Chop your onion into small pieces. In a large skillet over medium heat, melt the butter or margarine and saute the onion for 7 or 8 minutes until it starts to soften. Once the onion is getting lightly browned, add the apples to the pan. After a minute or so, drizzle the maple syrup over top, along with the lemon juice, salt, pepper, and cinnamon. Continue to cook the apples over low to medium heat for 6 - 8 more minutes, or until they're softened to your liking.


When everything has cooked, serve it however you'd like! I ended up combining the squash and apples into one dish when we actually sat down to eat. We enjoyed this meal with some When Pigs Fly harvest bread and a delicious side dish of quinoa, sweet potatoes, and dried cranberries made by the lovely Jenn. What a perfect fall meal!!


Friday, September 16, 2011

Friday Favorites, 9.16.11

Happy Friday! TGIF! I need some new Friday-related greetings... Ideas? Thanks! :)

It was a quiet week for me in terms of baking. I did have time to bake but I chose to use my time for other things (e.g., wedding planning research!). But don't you worry. I won't let the wedding consume my life over this next year. Baking will be a priority again soon!

What did I make this week though? Pumpkin ice cream! Amaaaaazing. I can't wait to share that recipe with you soon. In the meantime though, I thought I'd share a few pumpkin-based recipes I drooled over this week. Fall officially begins next week, friends! We must come prepared with lots of pumpkin recipes. :) Of course, there are many other fall flavors of which I am a huge fan. But let's begin with pumpkin, shall we?


With a name like that, how can these not be good?? Oh my goodness.


Recently discovered this blog and am highly enjoying it...  She's got some great recipes on there! And these pumpkin doughnuts with a caramel topping look to-die-for!
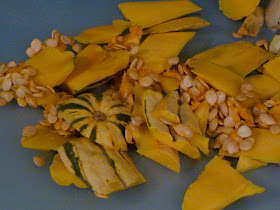


Talk about comfort food. This is perfect for the cooler weather coming our way soon!


I had to throw in one savory recipe! What a great idea for hummus. Never thought of making it pumpkin-flavored!


These would make the perfect fall weekend breakfast! And that cinnamon butter? Wowzahs.

Can you believe that I went to the grocery store yesterday specifically to stock up on canned pumpkin but I could not find any?!?? Yikes. Not good. Not this early in the season. Come Thanksgiving I might expect some difficulty finding it, but not this early on before fall has even started! Once I do find it, I am going to buy cans and cans of pumpkin... I may need to rent a storage unit for all the pumpkin I'm going to buy, folks.

Finally, do all of you know about Pinterest? Love love love this site! You've gotta check it out if you haven't yet. All of the recipes in my round-up today I found on pinterest. I am becoming slightly addicted to it. It's become especially useful for gathering wedding-related ideas. Come on over and follow some of my boards, if you'd like!

Have a wonderful weekend, everyone!

Tuesday, September 13, 2011

Homemade Peanut Butter Chip Ice Cream


Did you know that today, September 13th, is National Peanut Day? Neither did I until several of the various food blog and websites that I frequently visit mentioned it today. Even though my peanut butter chip ice cream recipe does not directly contain peanuts, they're obviously in there somewhere since this recipe involves peanut butter. ;-) So I thought it was fitting that I share this recipe with you today!

As you may know, if you read my last Friday Favorites post, I received an ice cream maker from Mike for my birthday in August. Hooray! I've been wanting one. :)

Last week we made our first batch together. Peanut butter chip was our flavor of choice! We used a recipe right from the Cuisinart booklet that came with the machine.

Ingredients:

-1 cup peanut butter (not natural)
-2/3 cup granulated sugar
-1 cup whole milk
-2 cups heavy cream
-1 tsp. vanilla extract
-3/4 cup semi-sweet chocolate chips (or whatever type of chips you choose)


Instructions:

In a medium mixing bowl on low speed, combine the peanut butter and sugar until smooth. Add the milk and mix on low speed until the sugar is dissolved, about 1 to 2 minutes. Stir in the heavy cream and vanilla. Cover and refrigerate 1 to 2 hours, or overnight.

Turn on your ice cream maker, and pour the mixture into the freezer bowl and let mix until thickened, about 15 to 20 minutes. Five minutes before mixing is completed, add the chips through the top and let mix completely. The ice cream will have a soft, creamy texture. If a firmer consistency is desired, transfer the ice cream to an airtight container and place in freezer for about 2 hours. Remove from freezer for about 15 minutes before serving.


This whole process was so fun! I've never made homemade ice cream like this before. :-D


Mike and I both agreed that this ice cream was deeelicious. However, beware; it is on the rich side. A small serving was all each of us could handle! And that's better for our waist lines anyway. ;-) But we really really enjoyed it, and we've also been enjoying it a few more times since we made it last week... We tried it immediately when it was ready and still on the softer side as far as ice cream goes. I loved the texture of it at that stage!! It's also great as a hard ice cream though after it's frozen longer. Either way = a tasty, homemade treat!


My sister gave me this great ice cream cookbook pictured below for my birthday... As we speak, I have pumpkin ice cream in the works! Can't wait to try it. If it's yummy, you'll see it here on the blog ASAP. I could not wait to make something pumpkin-y!! I couldn't hold it in any longer. That can of pumpkin in the pantry just had to be used. You can bet there will be a lot more baking with pumpkin this fall!!!


:)